Draw vs mateustalles (763)
| Opening: Pirc Defense | Result: 1/2-1/2 (Stalemate) | Time Control: 10 min Rapid | Rated |
Game Overview
Playing as Black, I was on the back foot early on but managed to win material through a series of knight forks and discovered checks. I was up a full six points of material and had a completely winning position, including a mate in one that I missed on move 23. From there I tried to convert but made a costly blunder, giving away my dark-squared bishop for free. The game simplified into a pawn race where we both promoted, I won my opponent’s queen with a series of checks, and then all I had to do was deliver a basic king and queen checkmate. With only seven seconds left on the clock, I fumbled it and stalemated my opponent on the very last move. A win in all but the final move.
The Pirc Defense (Moves 1-7)
1. e4 d6 2. Bc4 Nf6 3. d3 g6 4. Nf3 h6 5. O-O Bg7 6. Re1 O-O 7. Nc3 c6
I went with the Pirc Defense, fianchettoing my dark-squared bishop and getting castled without wasting too many moves. The only extra move was the prophylactic 4…h6, keeping White’s pieces out of g5. My opponent developed sensibly with Bc4, Nf3, O-O, Re1, and Nc3, building up a solid position.
White’s Attack and the Central Trades (Moves 8-17)
8. e5 dxe5 9. Nxe5 e6 10. Ne4 Nxe4 11. Rxe4 Nd7 12. Ng4 f5
White pushed 8. e5, supported by the knight on f3 and the rook on e1 behind it. I hadn’t faced an attack quite like this before, so I took it slow and tried not to panic. After the exchanges, White got the knight to e5 and the rook to e4, building up serious pressure. The bishop on c4 was staring straight at f7, which I knew could become a problem.
On move 12, White played Ng4 and I responded with 12…f5, forking the knight and the rook. I thought this was clever at the time, but the engine says 12…h5 was better, simply kicking the knight away without weakening my pawn structure.
13. Rxe6 Kh7
White found a strong reply: 13. Rxe6, getting the rook out of the fork while grabbing a pawn on e6. I could also see the discovered attack coming: if White moved the rook off the e-file, the bishop on c4 would be pointing straight at f7 with check. So I tucked my king away to h7.
14. Rd6 fxg4 15. Qxg4 Ne5 16. Rxd8 Nxg4 17. Rxf8 Bxf8
White slid the rook to d6, leaving the knight on g4 hanging. I took it with 14…fxg4, and after 15. Qxg4 I found 15…Ne5, forking the queen on g4 and the bishop on c4. This triggered a big trade sequence: queens came off, rooks got exchanged, and when the dust settled, I was up a knight.
The Knight Rampage (Moves 18-21)
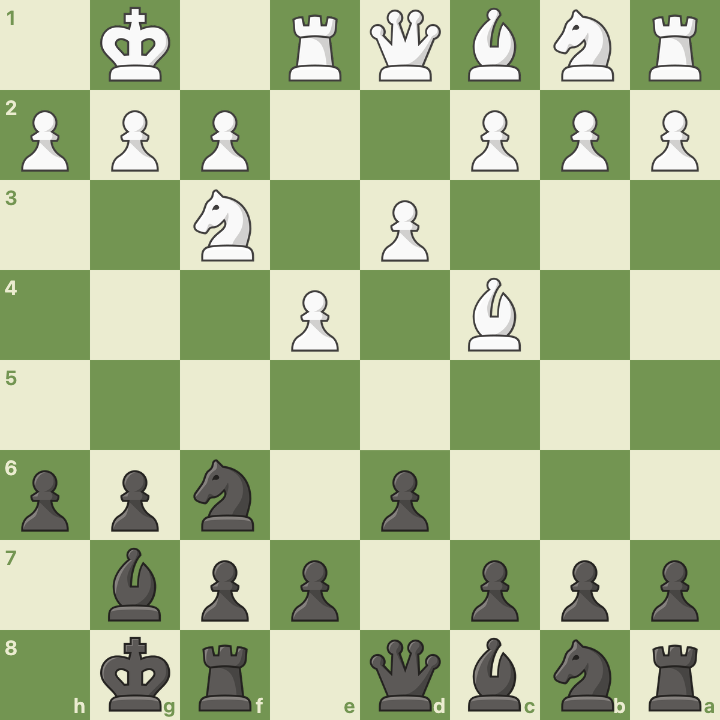
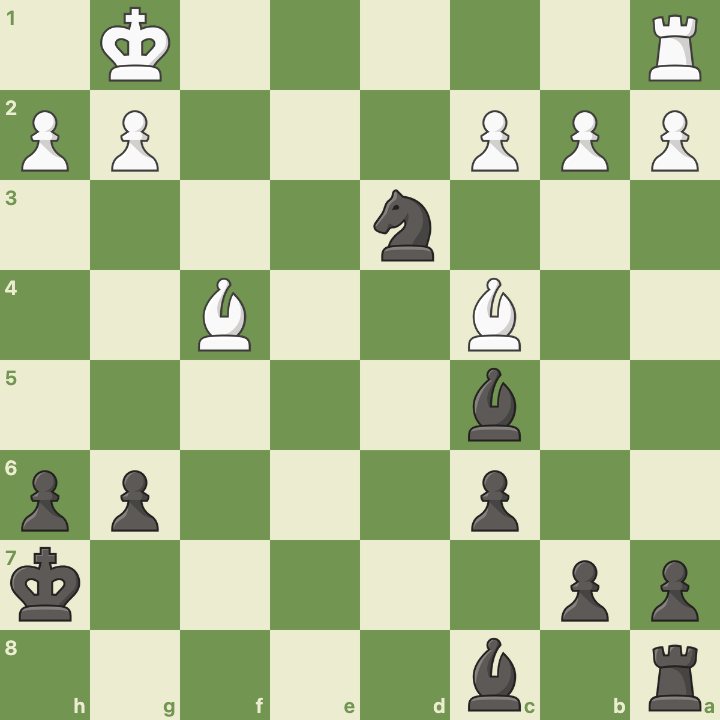
18. Bf4 Bc5 19. Kh1 Nxf2+ 20. Kg1 Nxd3+ 21. Kf1 Nxf4
This was the most satisfying sequence of the game. After 18…Bc5, my bishop was sitting on the a7-g1 diagonal, and when I played 19…Nxf2+, it was check. White had to move the king back to g1, and then 20…Nxd3+ was a discovered check from the bishop on c5, hitting the king through the now-cleared diagonal. The knight landed on d3 attacking White’s bishop on f4 at the same time. After 21. Kf1 Nxf4, I was up two full pieces.
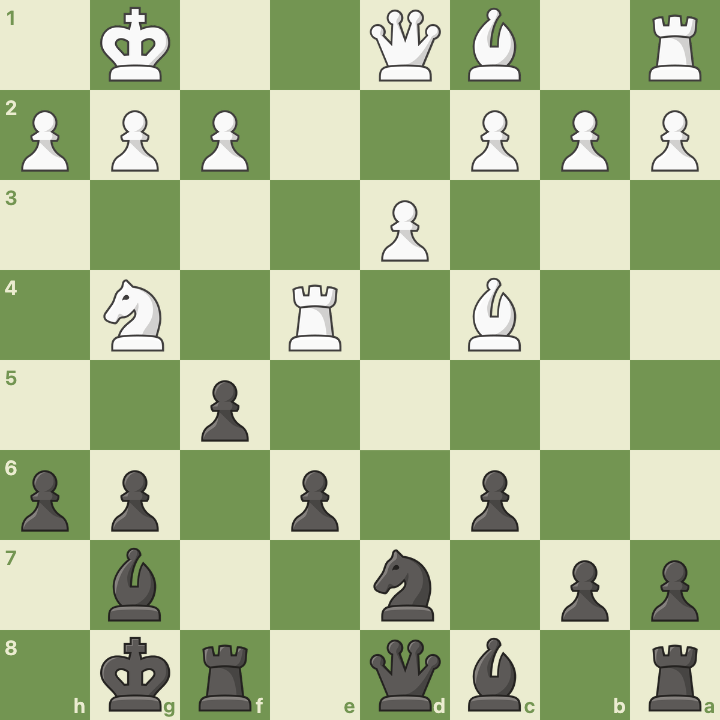
Missing Mate in One (Moves 22-23)
22. Re1 Bf5 23. g3 Nd5
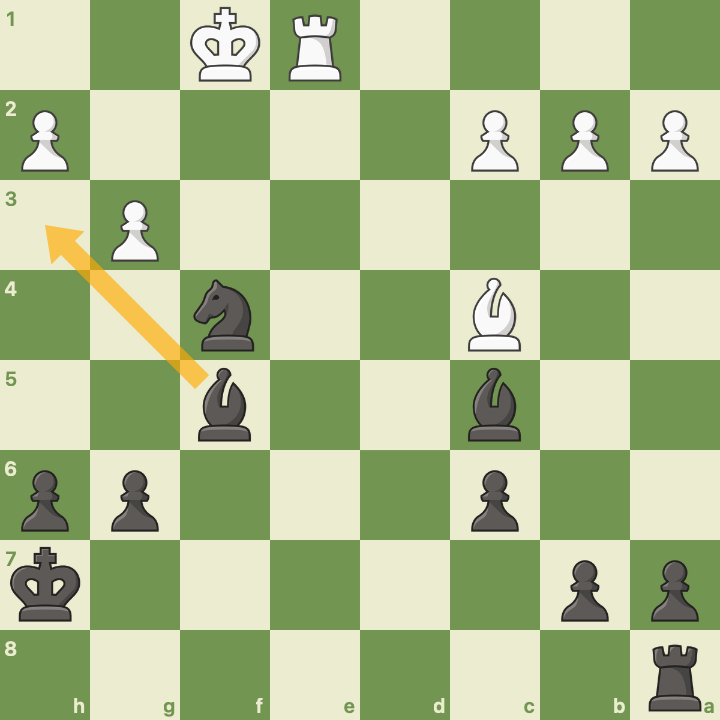
Up six points of material with a well-placed knight and active pieces. My light-squared bishop was still on its starting square though, and the a8 rook had zero activity. I needed to bring them into the game.
Then White played 23. g3 to kick my knight away, and I retreated with 23…Nd5. What I missed was that g3 had opened up a fatal weakness: 23…Bh3 would have been checkmate in one. The light-squared bishop delivers check on h3, and the dark-squared bishop and knight cover all of the king’s escape squares (g1, g2, and f2). A huge miss.
The Long Grind (Moves 24-44)
24. Re5 Bxc2 25. Bxd5 cxd5 26. Rxd5 Rf8+
I traded off more pieces and started trying to convert my material advantage. My rook came to the f-file with check, and I was hoping to clean up pawns and find a mating pattern.
27. Ke2 Rf2+ 28. Ke1 Rf5 29. Rd7+ Kg8 30. Rxb7
I moved my rook to f5, hoping to simplify, but looking back the engine says I should have stayed active on the second rank. White’s rook started chasing my king with checks and picked up the b7 pawn.
The correct mating pattern at this stage was to get both bishops sitting next to each other on the d and e files on the third rank, which pushes the king back to the first rank with no escape, then bring the rook up to h1 to deliver checkmate. That’s an important mating pattern I need to learn from this game.
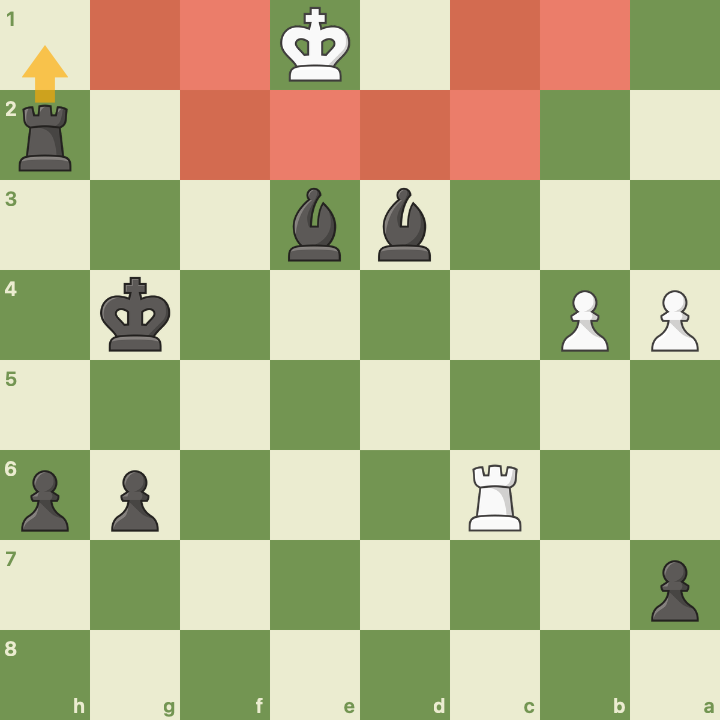
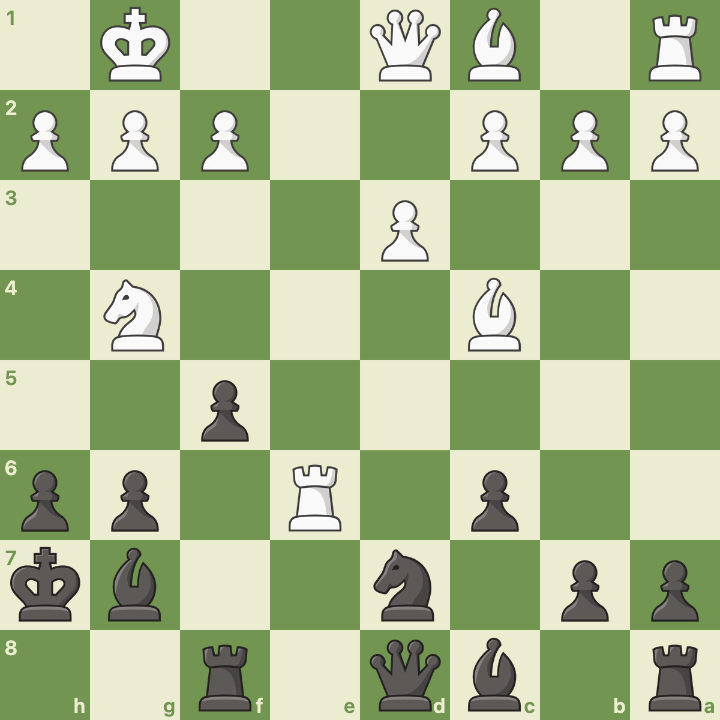
39. a4 Bc3+ 40. Rxc3
Then came my worst blunder. After some manoeuvring, I played 39…Bc3+, putting my dark-squared bishop right in front of White’s rook. An absolute blunder, no excuses. The rook just takes it. Instead, 39…Be3 would have established exactly the mating pattern described above, with both bishops on adjacent files cutting off the king.
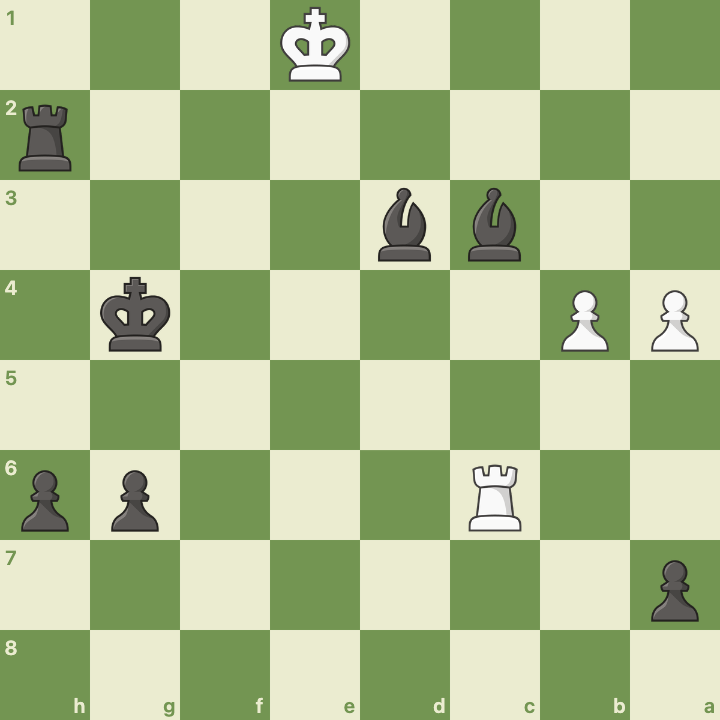
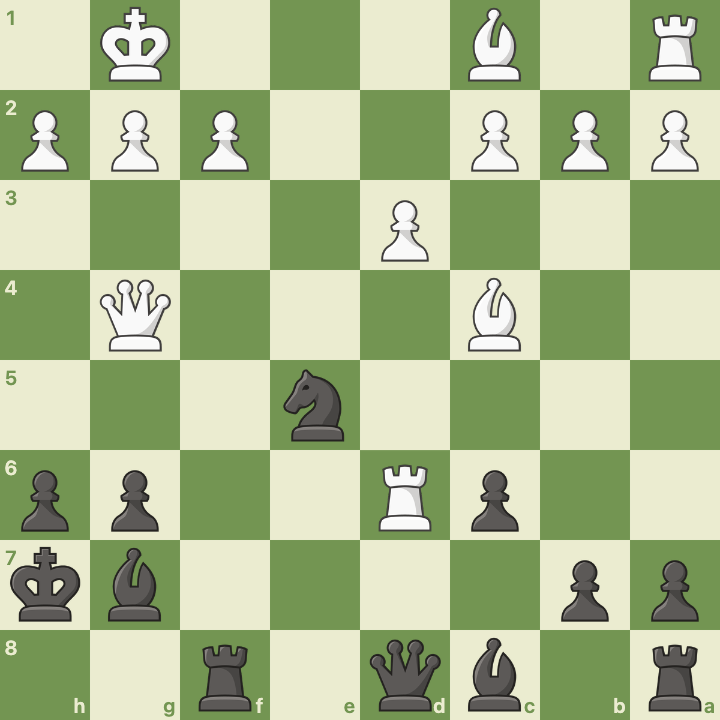
41. b5 Rf3 42. Kd2 h5 43. Rxd3 Rxd3+ 44. Kxd3
Even after losing the dark-squared bishop, I still had a rook, a light-squared bishop, two passed pawns on the kingside, and an isolated pawn on the queenside, against White’s rook and two pawns. That’s a winning position if I keep my pieces active. But instead of using my extra bishop, I traded it off on d3 and then swapped rooks immediately after. By move 44 I had nothing left but pawns. I should have been hunting down White’s remaining pawns with my material advantage rather than simplifying into a position where it all comes down to a pawn race.
The Pawn Race (Moves 44-49)
44…h4 45. a5 h3 46. b6 axb6 47. axb6 h2 48. b7 h1=Q 49. b8=Q
My h-pawn and White’s b-pawn sprinted down the board. I promoted first on move 48, but White promoted right after on move 49. Now it was queen vs queen.
Queen Wins and Stalemate (Moves 49-69)
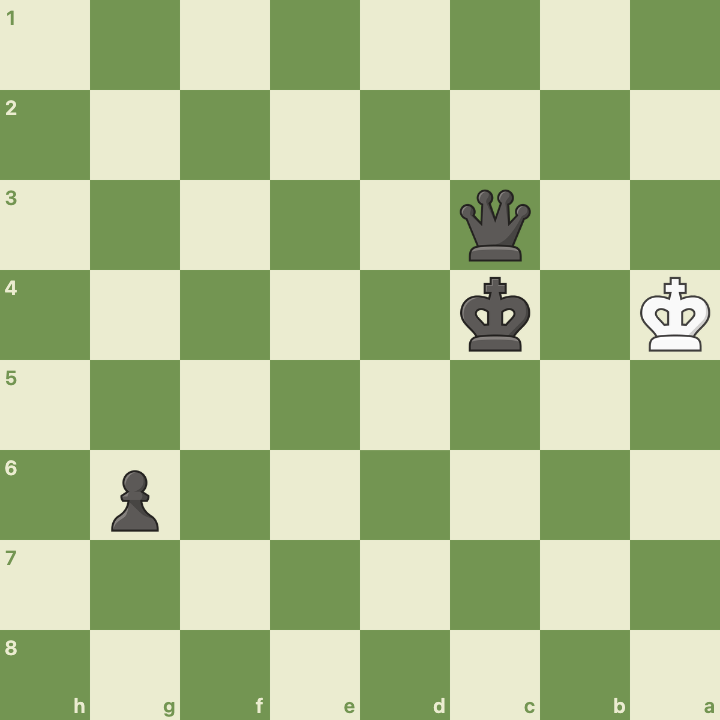
49…Qf1+ 50. Kd4 Qf2+ … 58. Kc6 Qxb8
I chased White’s king around the board with checks, and on move 58 my opponent made the mistake of putting the king on the same file as the queen. I checked, won the queen, and was now completely winning with king and queen against a lone king.

This should have been a walk in the park. Use the opposition technique, push the opponent’s king to the edge of the board, bring the queen in for the checkmate. I’ve done it before. But I only had 24 seconds on the clock, and that makes things tight.
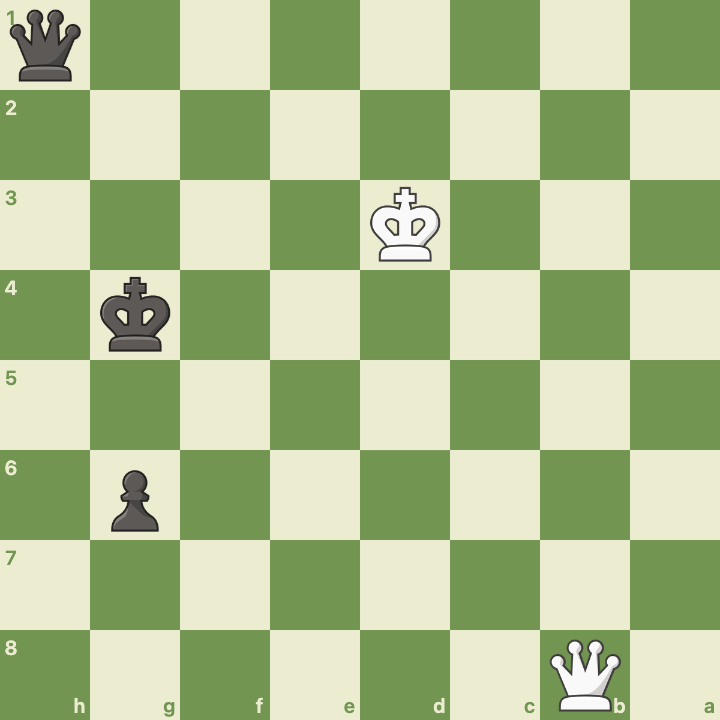
69. Ka4 Kc4 1/2-1/2
Move 69. The opponent’s king is on the edge of the board. My king and queen are two squares away. And it’s stalemate. I knew it was a possibility, but with seven seconds left, I just couldn’t find the accurate move in time.
In hindsight, it might have been easier under time pressure to simply push the g6 pawn to promotion rather than trying the king and queen technique. Park the queen behind the pawn, push it to promotion, and use a ladder mate with two queens. That’s a much simpler pattern to execute with seconds on the clock.
The engine also shows a clean technique: put the queen on the b-file to lock the opponent’s king to the a-file, then slowly push it down into the corner before mating with the queen on b7 or similar.
Engine Review
Move 12, Ng4 was a mistake by White, and my reply 12…f5 was also a miss. Rather than trying to fork, all I had to do was kick the knight with 12…h5. Much simpler.
13. Rxe6 was also a mistake by White, and my 13…Kh7 seeing the discovered attack possibility earned a “great move” from chess.com.
After all the trades, I was up a piece and White’s 19. Kh1 was a mistake. The engine says I’m completely winning with a five-point advantage.
Move 23: Missed mate in one. After 23. g3, the move 23…Bh3# is checkmate. The light-squared bishop on h3 delivers check, and the dark-squared bishop and knight guard all the king’s escape squares. A heartbreaking miss.
Move 39: Bc3+ was the big blunder. The correct move was Be3, establishing the two-bishop mating pattern on adjacent files. Instead, the bishop walked straight into the rook and the winning position evaporated.
The pawn race was razor-thin. Interestingly, if White had blocked the promotion square on h1 with the king, they could have promoted the a/b pawns with only my a-pawn in the way. But being one tempo too slow flipped the tables, and my h-pawn got there first.
The stalemate on move 69 was avoidable. The engine shows a clean pattern: place the queen on the b-file, which confines the opponent’s king to the a-file, then slowly escort it into the corner for the checkmate.
Reflections
A game of wild swings. I went from being under pressure to completely winning, missed a mate in one, blundered a piece, survived a pawn race, won my opponent’s queen, and then stalemated them with seven seconds left. Hard not to feel like this one got away from me.
What went well:
- The Pirc setup was solid and I castled efficiently.
- The knight rampage from moves 18-21 was the highlight. The discovered check with Nxd3+ was very satisfying.
- Seeing the discovered attack threat on move 13 and moving the king to h7 was good defensive awareness.
What to work on:
- Missed mate in one on move 23. I need to always check for forcing moves (checks, captures, threats) before retreating a piece, especially when I’m up material.
- The two-bishop mating pattern: get both bishops lined up on adjacent files to push the king back, then bring the rook in for mate. I need to practice this.
- King and queen checkmate technique under time pressure. Either practice the opposition method until it’s automatic, or have a backup plan like promoting another pawn for a ladder mate.
- Don’t trade down unnecessarily when up material. Keep pieces on the board to maintain the advantage.
Overall, despite the result, I enjoyed this game. It was challenging, exciting, and victory was within reach. The lessons are clear, and next time I’ll convert.
Full PGN:
1. e4 d6 2. Bc4 Nf6 3. d3 g6 4. Nf3 h6 5. O-O Bg7 6. Re1 O-O 7. Nc3 c6
8. e5 dxe5 9. Nxe5 e6 10. Ne4 Nxe4 11. Rxe4 Nd7 12. Ng4 f5 13. Rxe6 Kh7
14. Rd6 fxg4 15. Qxg4 Ne5 16. Rxd8 Nxg4 17. Rxf8 Bxf8 18. Bf4 Bc5
19. Kh1 Nxf2+ 20. Kg1 Nxd3+ 21. Kf1 Nxf4 22. Re1 Bf5 23. g3 Nd5
24. Re5 Bxc2 25. Bxd5 cxd5 26. Rxd5 Rf8+ 27. Ke2 Rf2+ 28. Ke1 Rf5
29. Rd7+ Kg8 30. Rxb7 Bg1 31. Rb8+ Kf7 32. Rb7+ Ke6 33. b4 Rh5
34. Kf1 Bd4 35. Rc7 Bd3+ 36. Ke1 Rxh2 37. Rc6+ Kf5 38. g4+ Kxg4
39. a4 Bc3+ 40. Rxc3 Rh3 41. b5 Rf3 42. Kd2 h5 43. Rxd3 Rxd3+
44. Kxd3 h4 45. a5 h3 46. b6 axb6 47. axb6 h2 48. b7 h1=Q 49. b8=Q
Qf1+ 50. Kd4 Qf2+ 51. Kd5 Qf3+ 52. Ke6 Qe3+ 53. Kd7 Qd3+ 54. Kc6 Qe4+
55. Kd7 Qf5+ 56. Kc6 Qe4+ 57. Kb5 Qb1+ 58. Kc6 Qxb8 59. Kd7 Kf5
60. Kc6 Qe8+ 61. Kc5 Ke5 62. Kc4 Ke4 63. Kb4 Kd4 64. Kb3 Kd3
65. Kb4 Qc6 66. Kb3 Qc4+ 67. Kb2 Qc2+ 68. Ka3 Qc3+ 69. Ka4 Kc4 1/2-1/2
Further Reading
- Pirc Defense: Complete Guide - Overview of the Pirc and its typical plans for Black
- King and Queen vs King Checkmate - The basic technique that I fumbled at the end