Win vs joseojedap (709)
| Opening: Queen’s Pawn | Result: 1-0 (Resignation) | Time Control: 10 min Rapid | Rated |
Game Overview
A relatively short game and my first rapid game in a little while. I played this one as a live stream of consciousness game after reviewing some recent games with my chess coach. I often feel a bit nervous during these but for this game I felt pretty good. The opening didn’t go exactly to plan but I got a decent position, saw an opportunity to attack Black’s queen, and it worked. A poetic win given that the last rapid game I reviewed with my coach was one where I blundered my queen and lost shortly after.
Development and the Pin (Moves 1-10)
1. d4 d5 2. Nf3 Nc6 3. a3 h6 4. e3 Bg4
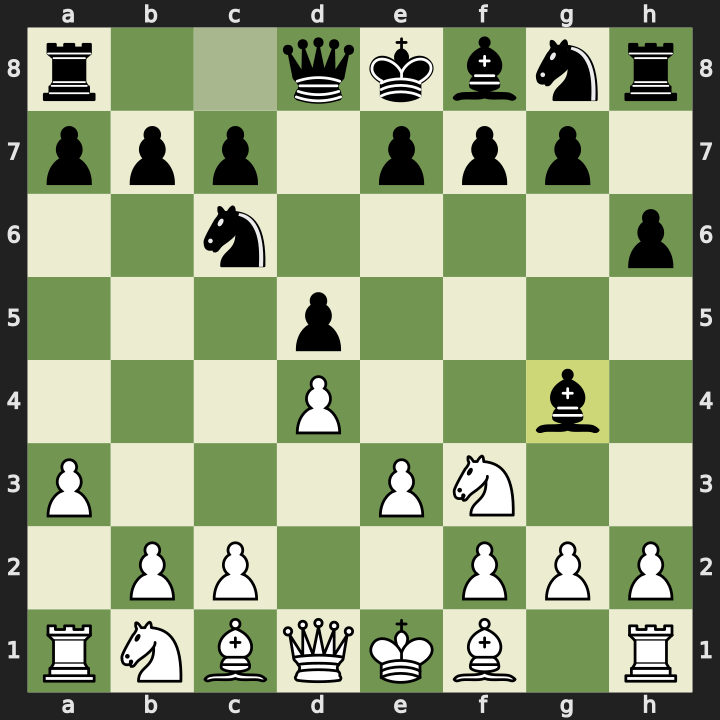
For the first 10 moves I was focused on developing. Black was quite eager to attack with single pieces, bringing the bishop to g4 to pin my knight. I can unpin by moving my light-squared bishop to e2, freeing up the knight which plays an important role in getting to the e5 square. Instead I went for Bd3 which wasn’t ideal.
5. Bd3 e5 6. dxe5 Nxe5 7. Nbd2 Nxd3+ 8. cxd3
Black brought the knight down to d3 and I was simply able to take material back. Black’s mistake was allowing me to trade their e-pawn for my c-pawn. Now I have two pawns in the centre where Black only has one. The only thing I wasn’t happy with from the opening was having to lose my light-squared bishop, which might have been better used to break the pin by relocating it to e2.
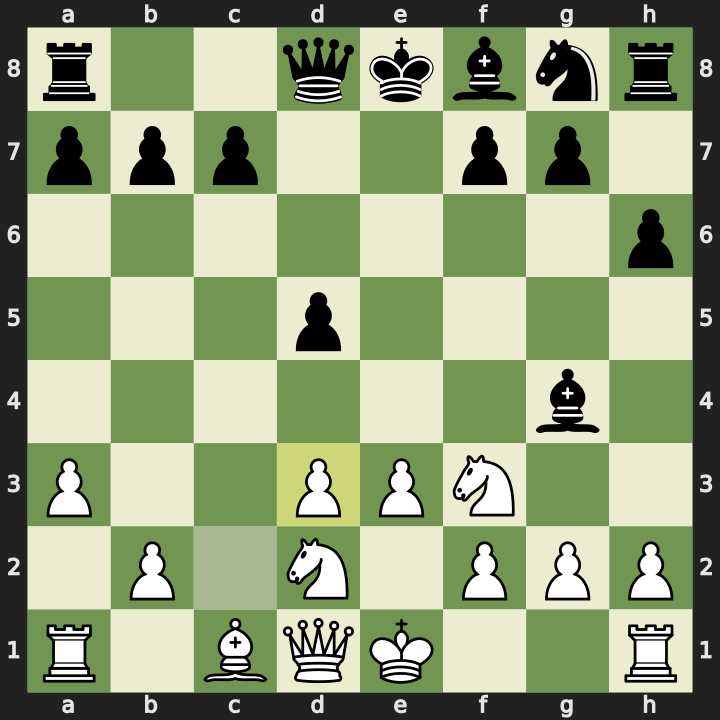
8…Nf6 9. O-O Qd6 10. h3 Bxf3 11. Nxf3
Queenside Attack (Moves 11-14)
11…O-O-O
Black castled queenside so it was time to press the attack. I pushed b4, seeing an opportunity to bring my queen out to b3 and then later move my dark-squared bishop somewhere to connect my rooks and attack on those key a, b, and c files.
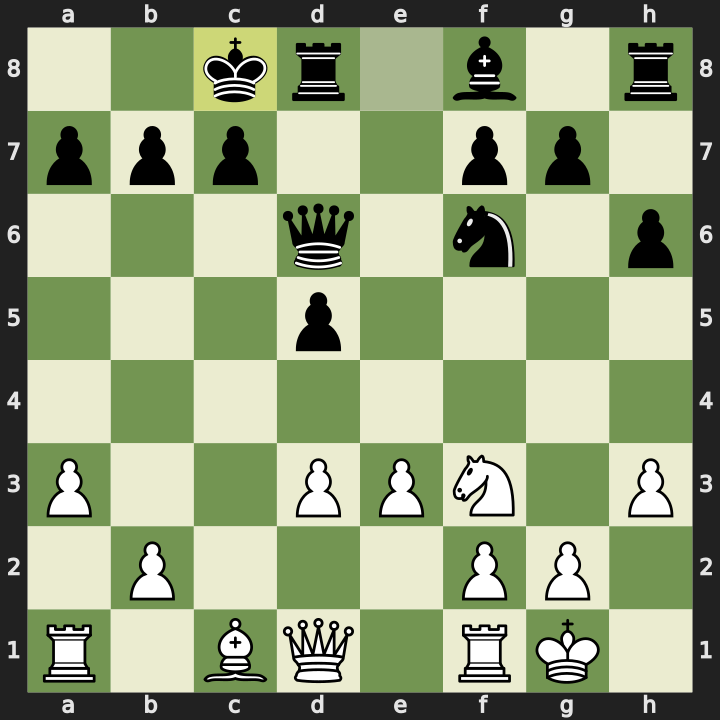
12. b4 Qa6 13. Qb3
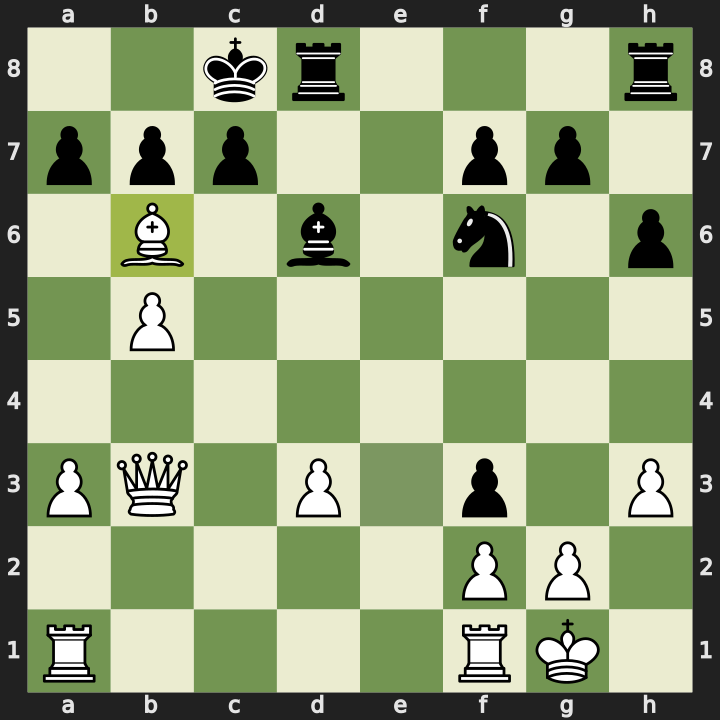
13…Bd6 14. b5 Qb6
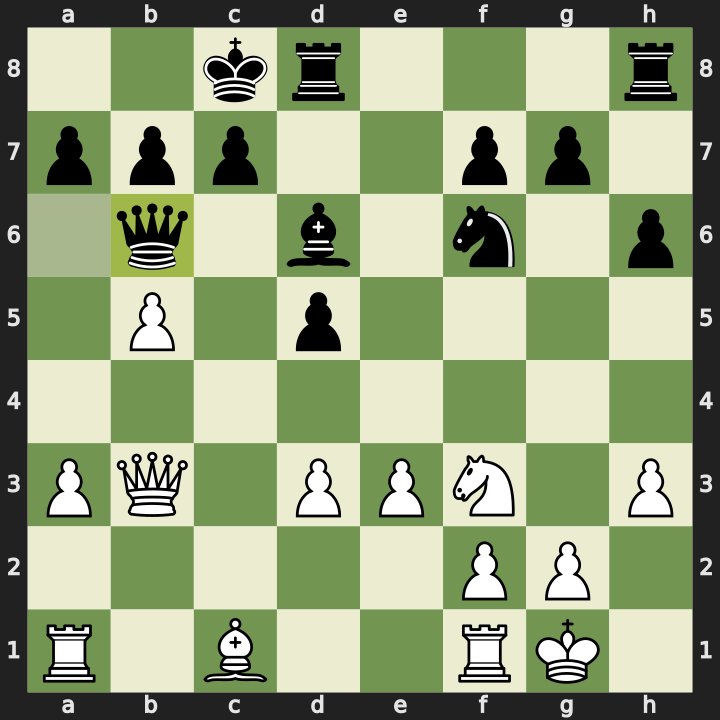
Black played Qa6 and then Bd6 and it felt like Black’s queen was getting a bit boxed in without much room to move. So I thought of an interesting plan. I’d push my pawn to b5 attacking the queen and asking where it would like to go. If it moved to b6, a pretty natural spot, I’d attack with my bishop by first pushing my pawn to e4 and then bringing the bishop to e3. It doesn’t guarantee that I can take the queen, it’s not completely trapped, but it certainly feels uncomfortable.
The Queen Trap (Moves 15-17)
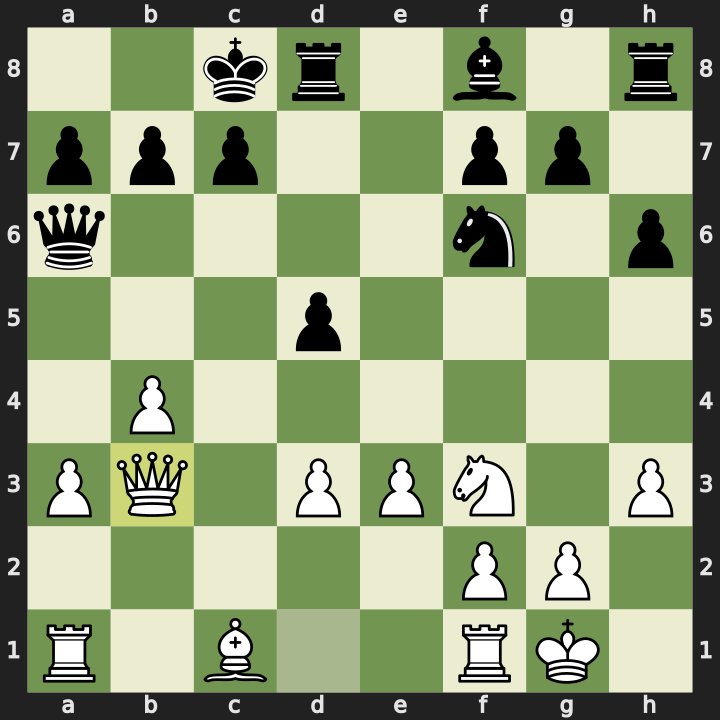
15. e4
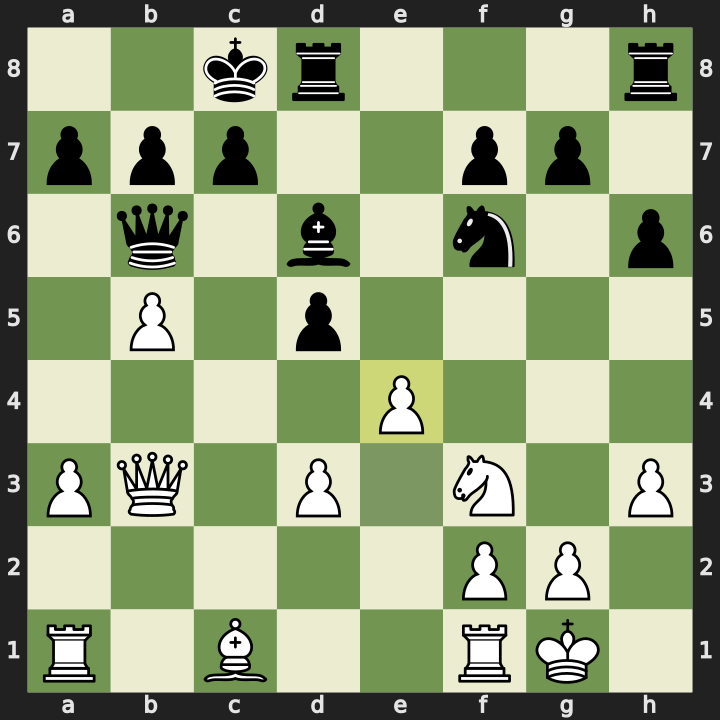
15…dxe4 16. Be3
The plan worked. I saw a pattern that works surprisingly often: leave one of my pieces hanging while attacking a more valuable piece. My opponents get a bit greedy, they see they can pick up a piece without realising they’re about to lose much more in return.
16…exf3
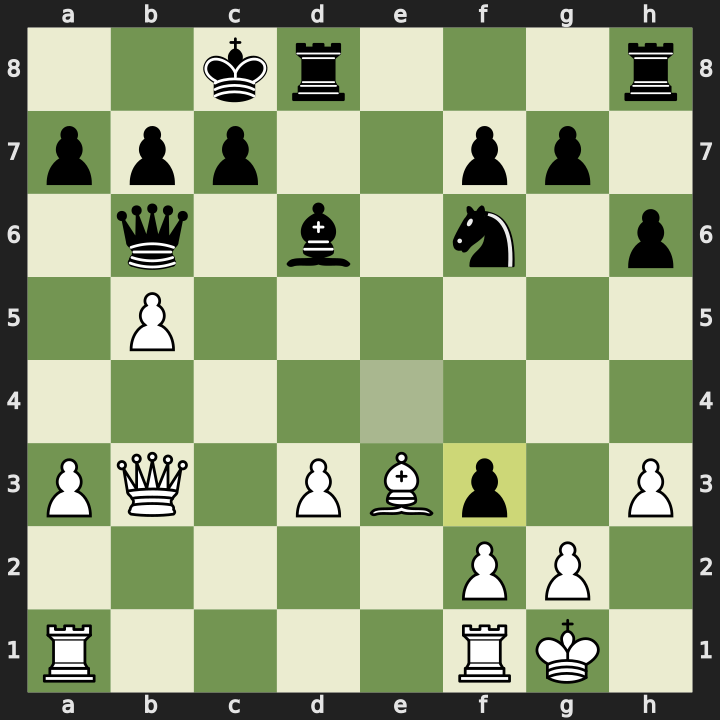
Which is what happened. Black took my knight with the pawn on f3.
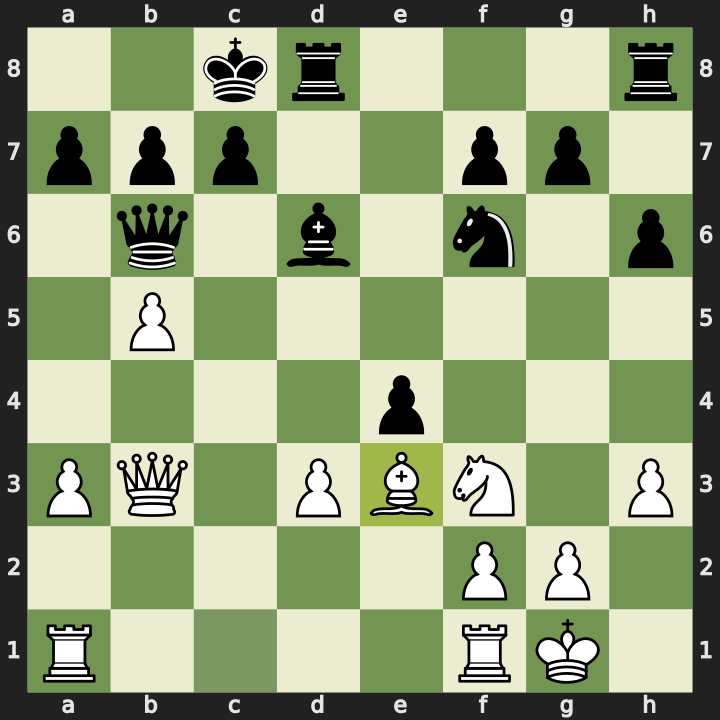
17. Bxb6
And I took the queen with my bishop on b6.
17…axb6
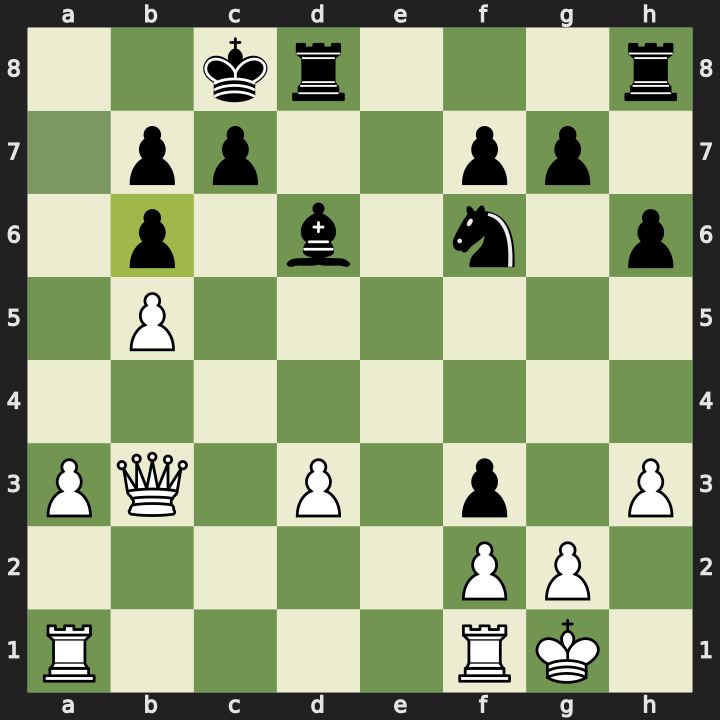
I was planning my next move, probably g3 just so I wouldn’t need to worry about that pawn that had advanced to the third rank, when Black resigned. Their position wasn’t completely lost. It cost me two minor pieces to get their queen. But I certainly appreciate the feeling of having blundered a queen. It’s hard to stay motivated to play out the remaining moves.
Engine Review
The engine gave me 82.3% accuracy and my opponent 75.4%. Interestingly neither side blundered, but there was a mistake for each and a brilliant move for Black.
Black’s brilliant move is 6…Nxe5, leaving the knight vulnerable to be attacked but there’s a very obvious pin on the only piece that can take it. Not sure I’d normally consider that a brilliant move but that’s the chess.com algorithm. It was offered up as a sacrifice, but I was never going to take it.
The engine doesn’t like my pawn push 15. e4, scoring that one a mistake, because if both players make best moves the position is just equal. Black needs to block the follow-up attack on their queen by my bishop by blocking with their own bishop. The more accurate move is to push a4: two pawns marching up the side of the board supported by a rook and queen ready to smash open the squares in front of the king.
Black’s mistake was 16…exf3, taking the knight and leaving the queen hanging. Black resigned with a +2.6 advantage to White.
Reflections
What went well:
- Defending against early attacks and getting into the middlegame with a reasonable, playable position.
- Coming up with a plan to pressure Black’s valuable pieces and feeling like I had the initiative.
What to work on:
- Deal with the pin of the knight to the queen that happens in a lot of games. It’s a popular move even though I feel it’s premature and doesn’t really lead anywhere. I can unpin by moving my light-squared bishop to e2, freeing up the knight which plays an important role in getting to the e5 square.
- Get back into more regular rapid games, keeping blitz games for warmup.
Full PGN:
1. d4 d5 2. Nf3 Nc6 3. a3 h6 4. e3 Bg4 5. Bd3 e5 6. dxe5 Nxe5 7. Nbd2 Nxd3+ 8.
cxd3 Nf6 9. O-O Qd6 10. h3 Bxf3 11. Nxf3 O-O-O 12. b4 Qa6 13. Qb3 Bd6 14. b5 Qb6
15. e4 dxe4 16. Be3 exf3 17. Bxb6 axb6 1-0