Win vs kalebwan (751)
| Opening: Pirc Defence | Result: 0-1 (Resignation) | Time Control: 10 min Rapid | Rated |
Game Overview
This was a fun game. I played much more accurately than my previous rapid game and got the closed centre that I really enjoy playing as Black. My opponent launched an aggressive attack with a knight outpost and a passed pawn deep in my territory, but I weathered the storm and found a winning endgame after the queens came off.
Opening and Closing the Centre (Moves 1-8)
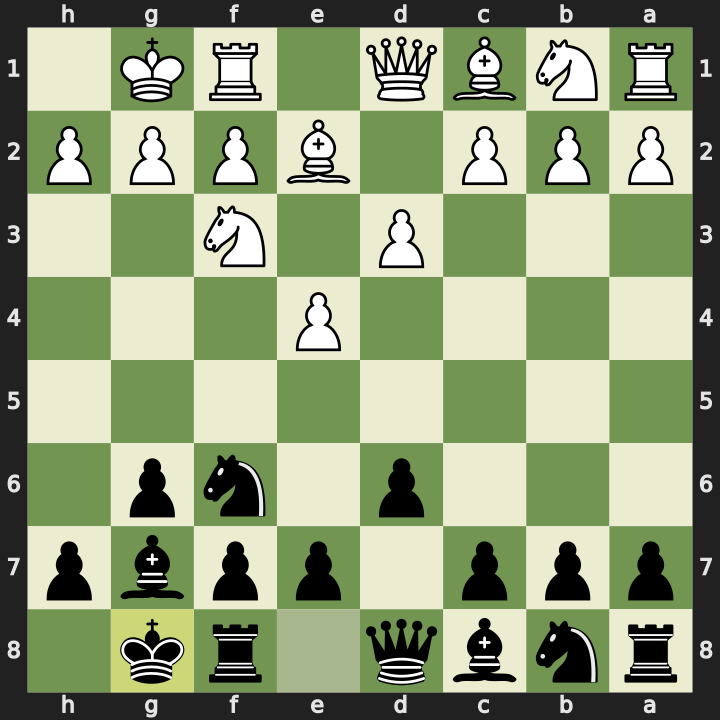
1. e4 d6 2. Nf3 Nf6 3. d3 g6 4. Be2 Bg7 5. O-O O-O 6. Nc3 e5 7. d4 Nc6
Another Pirc Defence. On move 7 White gets the two pawn centre with e4 and d4. I knew that you can provoke White into closing the centre by playing Nc6, asking them to push their pawn forward to d5.
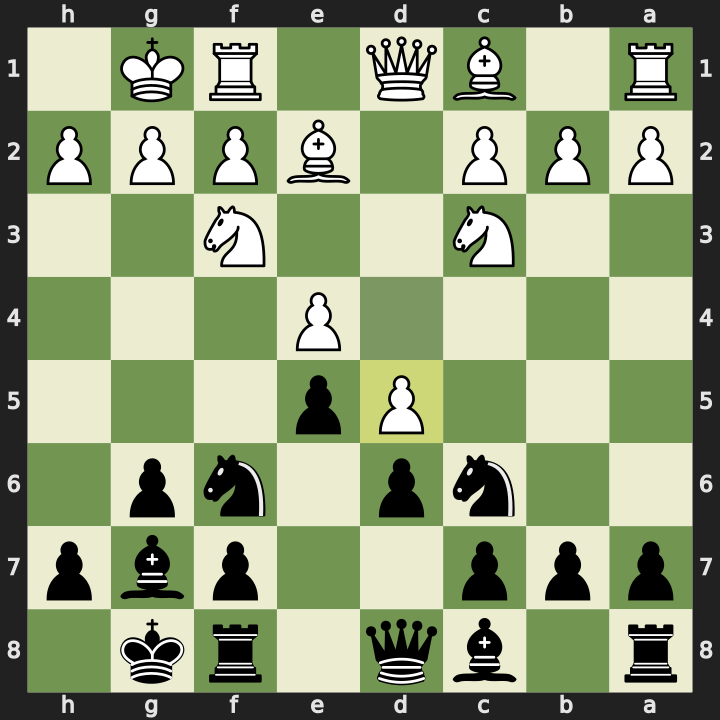
8. d5 Ne7 9. b3 Ne8 10. Ba3 f5
That gives White the space advantage but makes it difficult for their bishops to have much activity from their position over on the queenside. I was happy that plan worked. Now I go for the f-pawn break.
The f4 Pawn Chain (Moves 11-12)
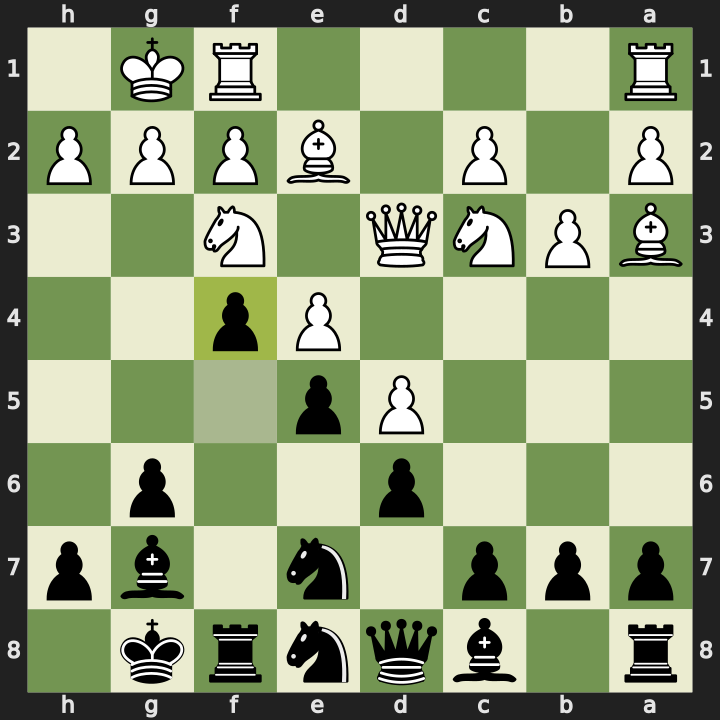
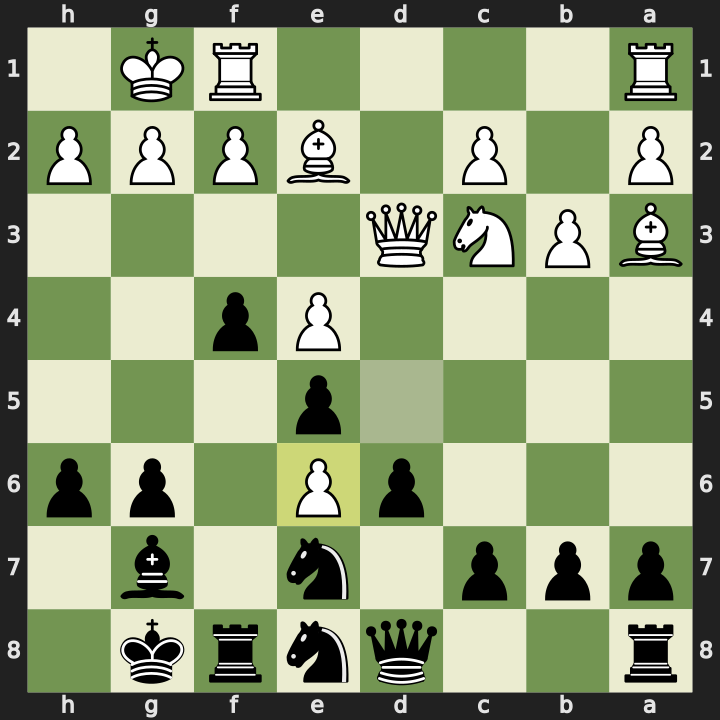
11. Qd3 f4
My opponent doesn’t take the f-pawn and I’m able to push it forward to f4. Now I have a very nice pawn chain from c7 to f4 giving me some space to manoeuvre my pieces and try to attack White’s king. What I didn’t really consider is that I hadn’t prevented Ng5.
Knight Outpost and the e6 Pawn (Moves 12-15)
12. Ng5 h6 13. Ne6 Bxe6 14. dxe6 Qc8
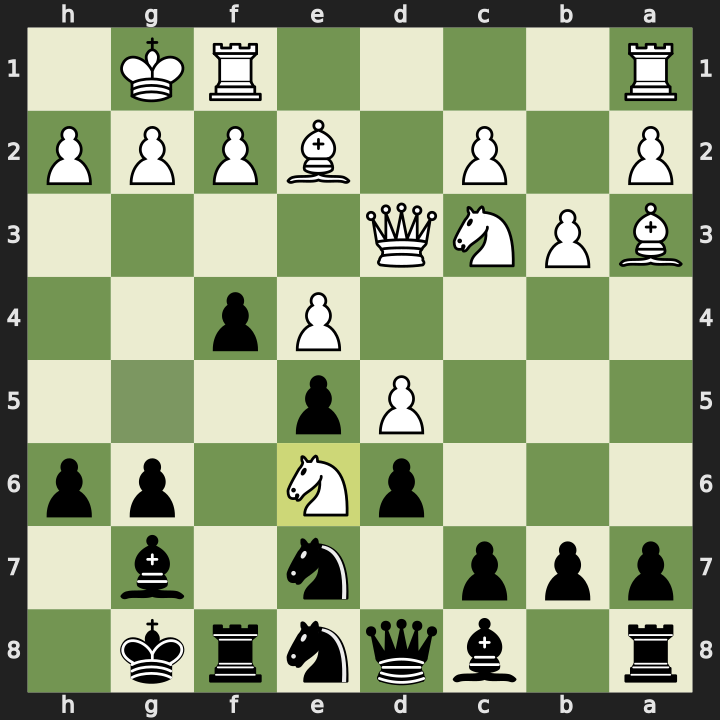
White’s knight hopped in. I kicked it with h6 but it found an outpost on e6, forking my rook and queen. I had no choice. I had to take it with my light-squared bishop. White takes back with their pawn, so now I have a pawn on e6 to deal with.
I thought I could take it out with my queen but White made a very strong defence.
White’s Battery (Moves 15-18)
15. Bg4 Nf6 16. Qh3 h5 17. Bf3 Nc6 18. Nd5 Re8
White set up a battery of the queen on h3 and bishop on g4 to defend the pawn on e6. I kicked out the bishop by advancing the h-pawn to h5, but I still had a queen awfully close to my king and a pawn on my side of the board that I really didn’t like. It was preventing me from being able to manoeuvre my pieces. I came up with a plan: get a knight to d4 where it could then take the pawn on e6.
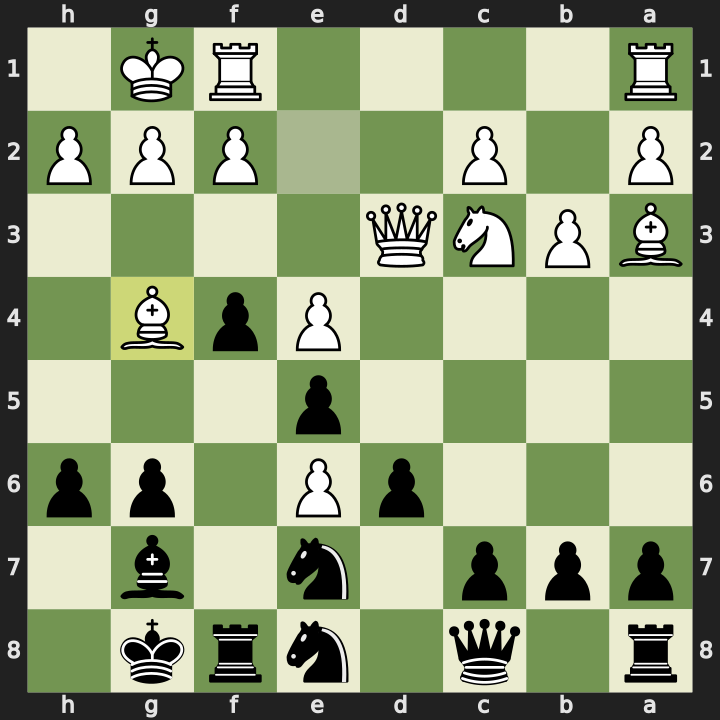
The Bishop Sacrifice (Moves 19-21)
19. Nxf6+ Bxf6
White brought in a third attacking piece, taking my knight on f6 with their knight. I had to take back with my bishop.
20. Bxh5 gxh5 21. Qxh5 Qxe6
White then made a sacrifice of their bishop for the last remaining pawn in front of my king. This is the kind of move that I like to play as White as well, so I respect it. I took back with my pawn and they took the pawn with the queen. I’m able to get rid of that annoying pawn on e6, but now my king is quite unsafe and it’s blocking the path of the rooks that want to get over to the kingside for an attack.
Evading Checks and Trapping the Queen (Moves 22-28)
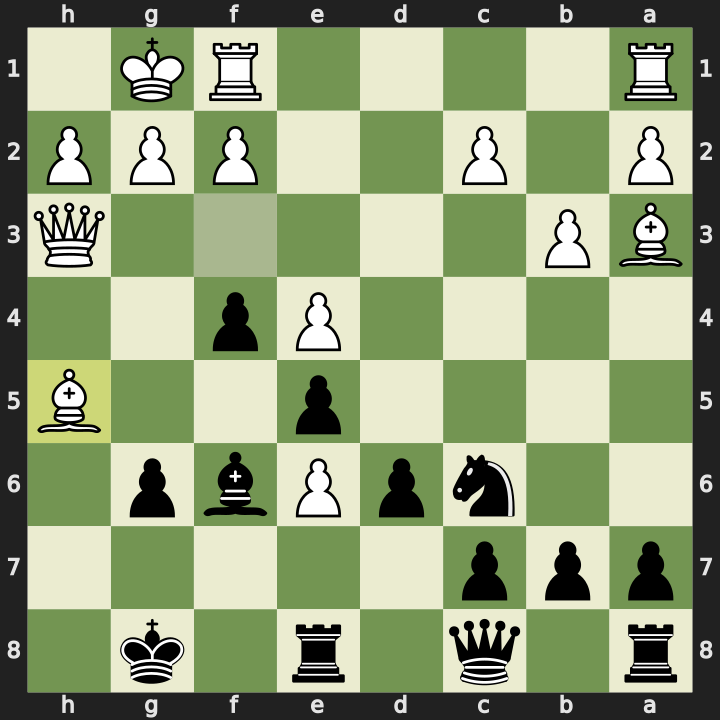
22. Qg6+ Kf8 23. Rad1 Ke7 24. Qh7+ Kd8 25. f3 Rh8 26. Qg6 Kd7 27. h3 Rag8 28. Qf5 Nd4
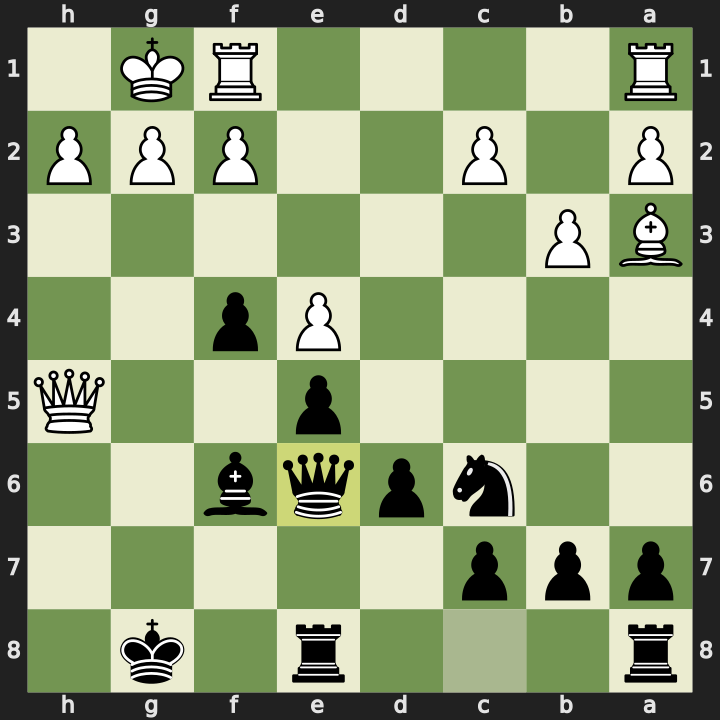
I evade the checks from White’s queen and then realise that the position is so closed that the queen has nowhere to go. I point both my rooks at the g and h files and think I might have it trapped, but White finds a good square, offering a trade by moving their queen to f5.
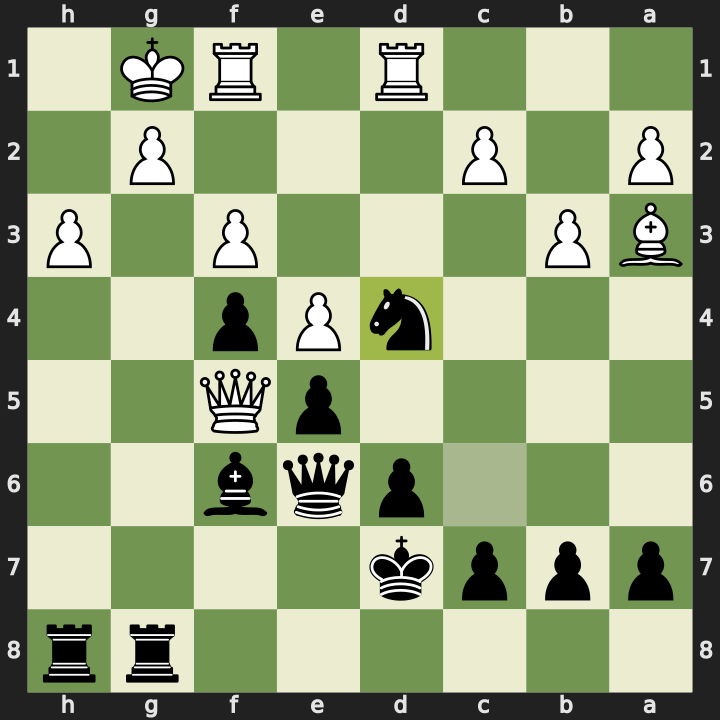
I really didn’t want to let another pawn into my side of the board, so I let White’s queen take my queen. Moving the knight to d4 has the benefit of blocking the rook’s pressure on d6, the pawn in front of my king. I’m thinking I’ll leave that knight in place and take back with my king, then see if I can cause some trouble with the knight. It’s also eyeing the pawn on c2.
Winning the Endgame (Moves 29-35)
29. Qxe6+ Kxe6 30. c3 Ne2+ 31. Kf2 Nxc3 32. Rd3 Nxa2 33. Ra1
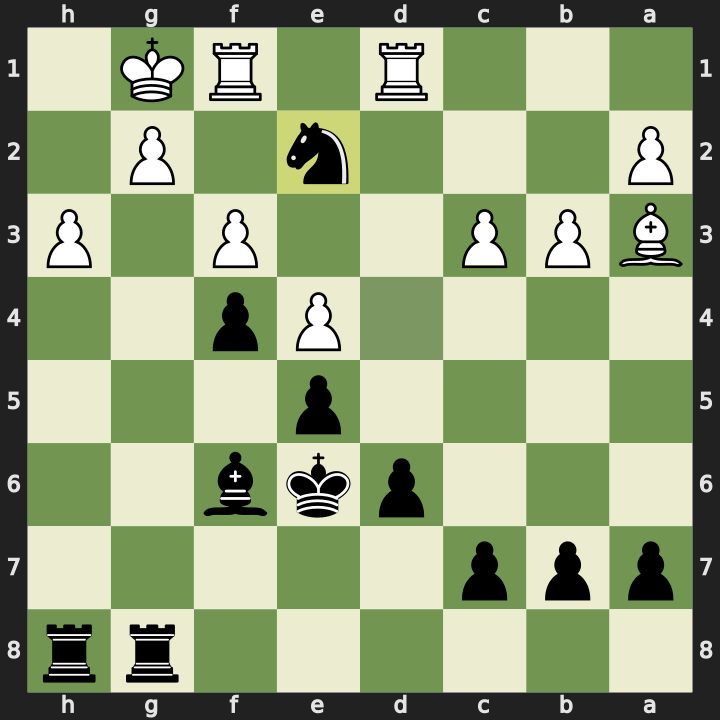
We exchange queens and White pushes their pawn to c3, kicking my knight. I throw in a check, seeing that I’ll be able to take that pawn next turn while threatening a rook. White’s rook attacks my knight so I pick up another pawn on a2. I was aware that this would probably trap my knight, but I’m already up three points in material so I wasn’t too concerned about it. It should still win with the extra points.
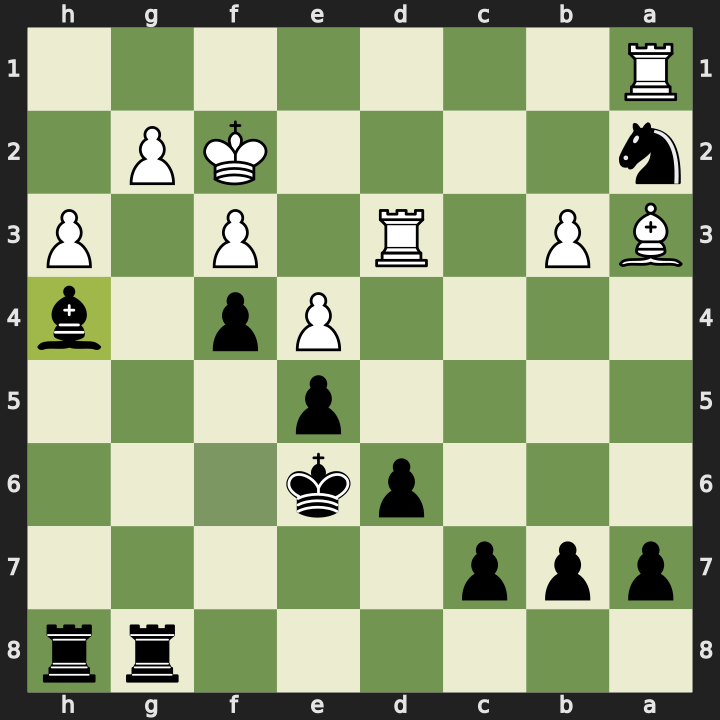
33…Bh4+ 34. Ke2 Rxg2+ 35. Kd1 Rg1+
And here’s where White’s position starts to fall apart. I see the king is exposed on the diagonal where I can give it a check with my bishop, so I play Bh4+. White blunders by moving their king to e2, giving up the defence of their pawn on g2. That allows me to bring in my rook, check the king, and save my knight which is sitting over on a2.
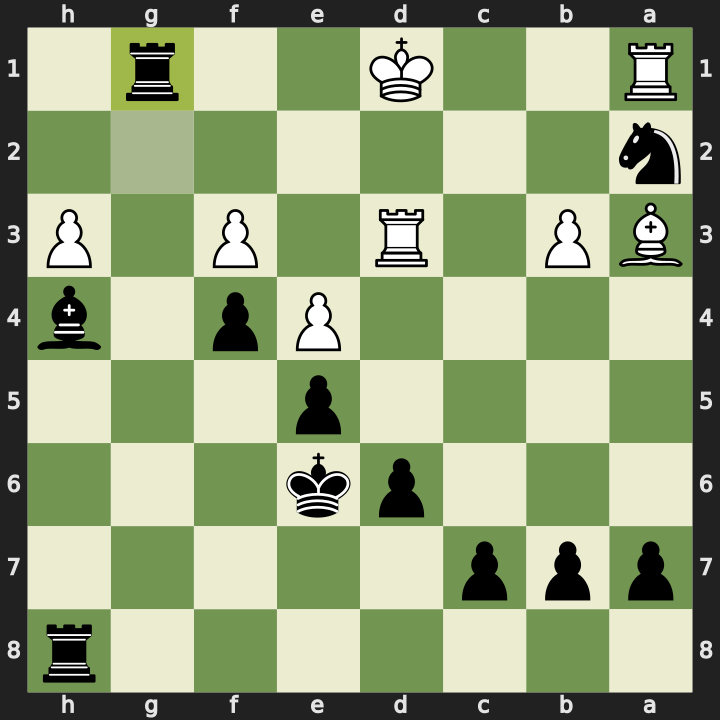
White moves the king to the first rank but that allows me to check and win the rook on a1. From here I would have been able to bring in my second rook. It would have been either checkmate or just trade down, and I’d be up a rook and a piece with a fairly comfortable endgame to win. White resigns.
Engine Review
Much more accurate this game than my previous one. 86.8% accuracy for me and 79.2% accuracy for my opponent. Both played quite well. Game rating for me was 1500, for my opponent 1350.
My mistake was playing h6, because it allowed that annoying knight move to e6 followed by the pawn to e6. The best move is actually Nf5, which I didn’t consider because that knight can immediately be taken by the pawn on e4. But it’s just an exchange because Black can take back with Qxg5. Good pattern for me to remember: I just needed to clear the way for my queen to attack that knight, and then if they were to come to e6 it would be exchanged with the bishop. Still not pleasant, but might have avoided some of the troubles I ran into.
The engine doesn’t like the bishop sacrifice Bxh5, scoring it as a blunder. It just didn’t have enough supporting pieces to really cement the attack.
White’s major mistake was moving the king to Ke2 after being checked. There is some advice you often hear about centralising the king in the endgame, but in this case it shouldn’t have been at the expense of a key backward pawn that was stopping my rooks from infiltrating.
Reflections
What went well:
- The opening. Playing accurately and having a blunder-free game. There were two moves scored as mistakes, but neither cost me significant damage.
- Provoking White into closing the centre with d5, getting the type of position I wanted.
- Weathering the attack after the bishop sacrifice and finding the winning endgame.
What to work on:
- Study the f5/f4 pawn push a bit more to see if there was a better way of doing it. It may have been a bit premature to push so far forward. Maybe I should have prevented Ng5 first.
- Letting my knight get trapped on a2 was a bit reckless. I probably should have calculated a bit more carefully there.
Full PGN:
1. e4 d6 2. Nf3 Nf6 3. d3 g6 4. Be2 Bg7 5. O-O O-O 6. Nc3 e5 7. d4 Nc6 8. d5 Ne7
9. b3 Ne8 10. Ba3 f5 11. Qd3 f4 12. Ng5 h6 13. Ne6 Bxe6 14. dxe6 Qc8 15. Bg4 Nf6
16. Qh3 h5 17. Bf3 Nc6 18. Nd5 Re8 19. Nxf6+ Bxf6 20. Bxh5 gxh5 21. Qxh5 Qxe6
22. Qg6+ Kf8 23. Rad1 Ke7 24. Qh7+ Kd8 25. f3 Rh8 26. Qg6 Kd7 27. h3 Rag8 28.
Qf5 Nd4 29. Qxe6+ Kxe6 30. c3 Ne2+ 31. Kf2 Nxc3 32. Rd3 Nxa2 33. Ra1 Bh4+ 34.
Ke2 Rxg2+ 35. Kd1 Rg1+ 0-1