Win vs rolmr (736)
| Opening: Queen’s Pawn Game, Chigorin Variation (D02) | Result: 1-0 (Resignation) | Time Control: 10 min Rapid | Rated |
Game Overview
This was a fun game. I had a bit of an attack going and then my opponent must have got completely tunnel vision on their own attack, because they blundered their queen one square away from mine and then resigned.
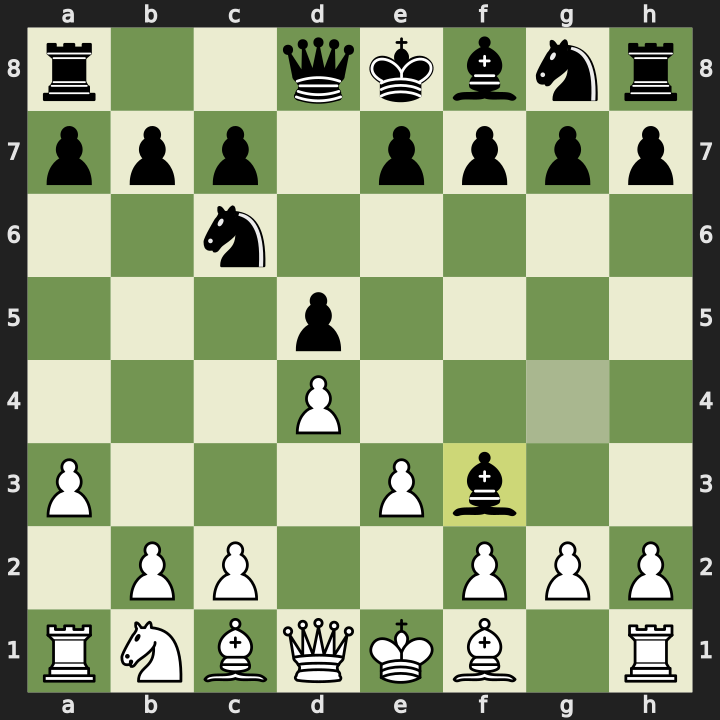
The Opening (Moves 1-4)
1. d4 d5 2. Nf3 Nc6 3. e3 Bg4 4. a3 Bxf3 5. Qxf3
The first few moves of the opening were pretty standard. Black chose to exchange their bishop for a knight on f3, which I think isn’t always a great idea. Having the bishop pair can certainly be advantageous.
Setting Up the Battery (Moves 5-11)
5…e6 6. Bd3 Nf6 7. Nd2 Bd6 8. O-O O-O
Standard development. Both sides castle kingside and the position is symmetrical enough.
With my queen on f3 I saw an opportunity. If I push e4 and trade the central pawns and knights, my queen ends up on e4, forming a queen and bishop battery with my bishop on d3, aimed at h7 with a mate threat.
9. e4 dxe4 10. Nxe4 Nxe4 11. Qxe4 g6
I triggered the trades of pawns and knights, and got my battery. Simple Qxh7 would be checkmate, so Black plays g6 to save the mate. The side effect is that g6 opens up the h6 square for my dark-squared bishop.
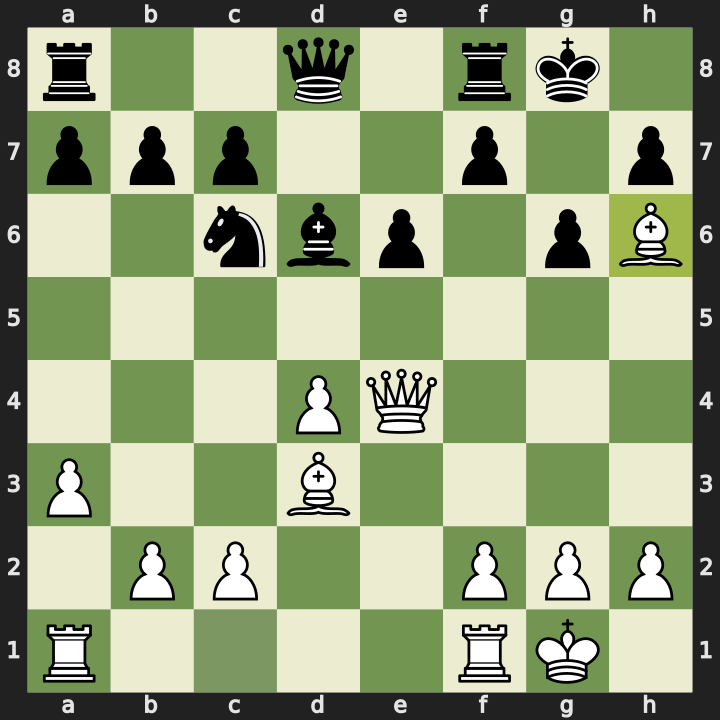
Bishop Swings In (Move 12)
12. Bh6 Re8
The bishop comes in to h6, attacking the rook on f8. Black moves the rook to e8.
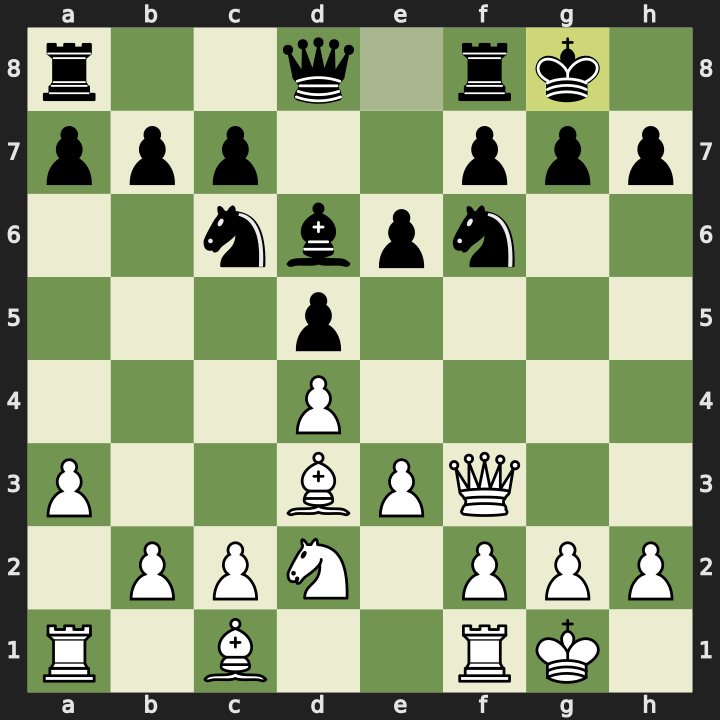
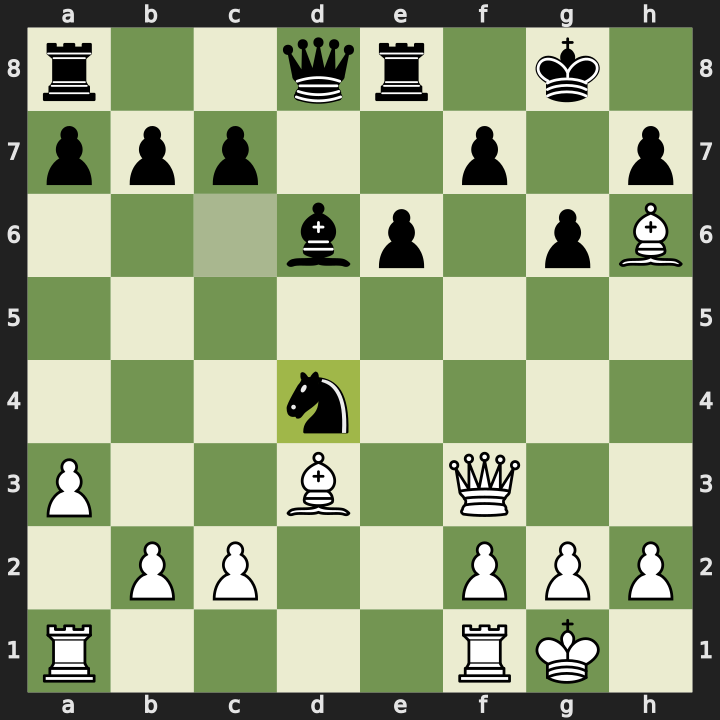
Continuing the Attack (Move 13)
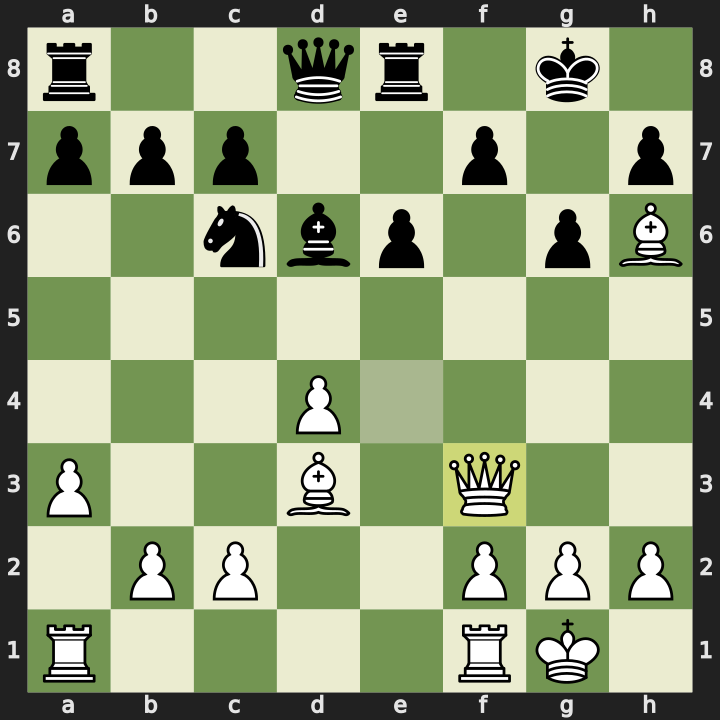
13. Qf3 Nxd4
I looked for a way to continue the attack and ended up just playing Qf3. Black took the pawn on d4 with the knight, threatening my queen.
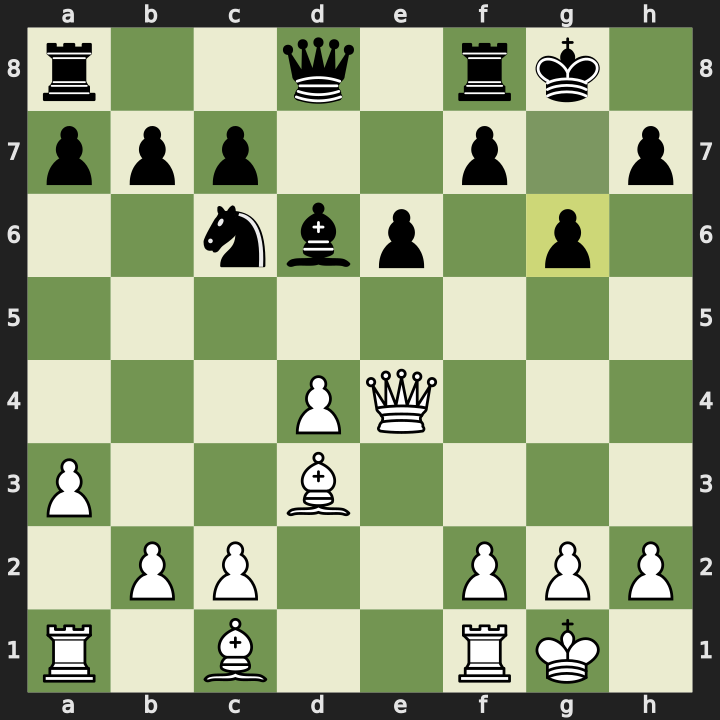
The Queen Blunder (Moves 14-15)
14. Qg4 Qh4
I moved the queen again, this time to g4.
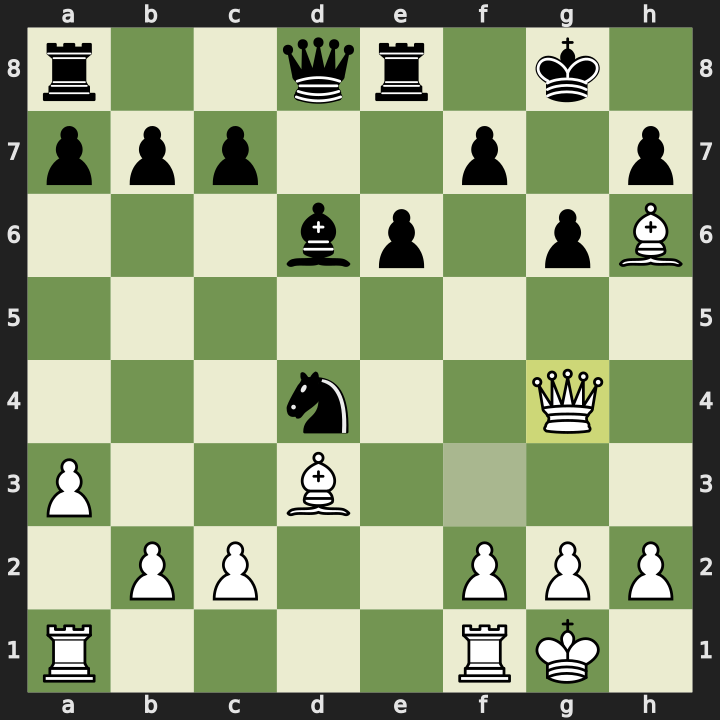
From this position I can only assume Black saw their own checkmate threat with Qxh2, so they brought the queen over to h4. But my queen is now on g4 one square away, and I can just take.
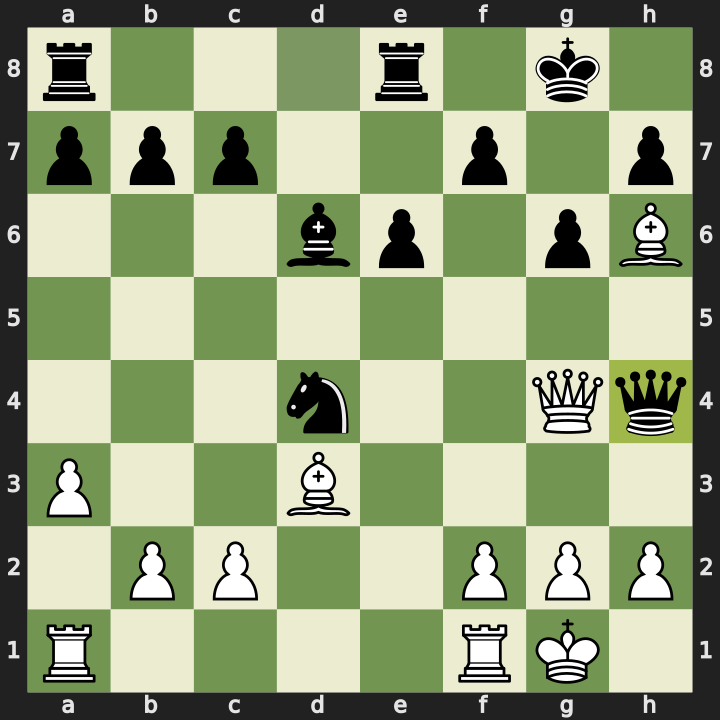
15. Qxh4

Black resigned.
Engine Review
My e4 push was a mistake. If Black had found the best move they would have been in a good position. Rather than taking e4 with the pawn, they should have taken on d4 with the knight. That would have threatened my queen and ruined my whole plan. As it turned out they played into my plan and maintained a slight advantage once I had the battery set up.
Qf3 was a blunder for me. With correct play Black can compromise my king safety by playing Qh4, attacking the bishop on h6 and threatening Qxh2 checkmate. The only way to prevent the mate and save the bishop is to offer a queen sacrifice with Qh3. If Black accepts the exchange, my king is exposed with doubled pawns on the h-file. Black did play Qh4 on the next move, but by then my queen had moved to g4 where it could just take the queen, and the threat was gone.
Qh4 was the final blunder for Black.
Reflections
What went well:
- Spotting the queen and bishop battery idea aimed at h7 and triggering the trades to set it up.
- Bringing the bishop into h6 after g6 was forced.
What to work on:
- Qf3 left the bishop on h6 undefended and gave Black a chance to play Qh4 with a mate threat. I got away with it because Black grabbed the pawn instead, but I need to check for threats against my own king before continuing an attack.
Full PGN:
1. d4 d5 2. Nf3 Nc6 3. e3 Bg4 4. a3 Bxf3 5. Qxf3 e6 6. Bd3 Nf6 7. Nd2 Bd6 8. O-O
O-O 9. e4 dxe4 10. Nxe4 Nxe4 11. Qxe4 g6 12. Bh6 Re8 13. Qf3 Nxd4 14. Qg4 Qh4
15. Qxh4 1-0