Win vs GudoFF (1319)
| Opening: Pirc Defense (B07) | Result: 0-1 (Resignation) | Time Control: 3 days/move (Daily) | Rated | Event: 92nd Chess.com Daily Tournament (1201-1400), Round 1 |
Game Overview
Another win against this opponent in round one of the 92nd Daily Tournament, this time with the black pieces and the Pirc Defense. I’m very happy with the accuracy here. We played quite a few moves with the position dead equal before my opponent cracked, made a couple of mistakes, and let me into a winning endgame a rook up. The story of the game is the queenside counterplay: with the kings on opposite sides I went after White’s king on the a-file rather than just defending, and it ended with White’s queen trapped in the corner.
The Opening (Moves 7-10)
1. e4 d6 2. Nf3 Nf6 3. Nc3 g6 4. Bc4 Bg7 5. d4 O-O 6. Be3 Nc6
The opening was pretty standard. One thing I missed was the clever knight sacrifice the Pirc is famous for, 7…Nxe4 8. Nxe4 d5, where the d-pawn forks the bishop on c4 and the knight on e4, and after the bishop moves I round up one of them with 9…dxe4 to win the piece straight back.
7. Qd2 Ng4 8. Bf4 e5
Instead I manoeuvred my knight up to g4, kicking the bishop and preparing the e5 break I wanted to play.
9. dxe5 Ncxe5 10. Nxe5 Nxe5
I get e5 in, and then we trade knights on e5.
The Battery and Opposite Castling (Moves 11-13)
11. Bb3 Re8 12. O-O-O Be6 13. Bh6
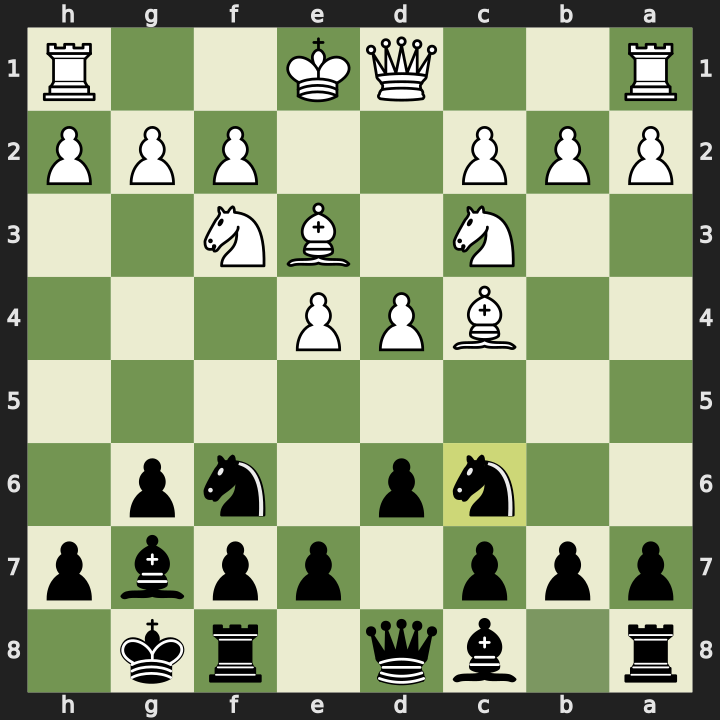
In this position I noticed how well White had set up the queen and bishop battery on the c1-h6 diagonal, aimed at crippling my fianchetto bishop on g7. With White castling queenside and my king already on the kingside, this was shaping up as an opposite-side castling fight.
On move 13 White played 13. Bh6, and I could see I’d be able to take back with the king, so I didn’t capture on h6 straight away.
Eliminating the Bishops (Moves 13-15)
13…Bxb3 14. axb3 Bxh6 15. Qxh6
First I wanted to eliminate the light-squared bishop, which was also pointing at my king. White recaptured with the a-pawn. Then I took the bishop on h6, partly to draw the queen away from the defence of the king.
That left White with only one long-range piece actively involved in the attack.
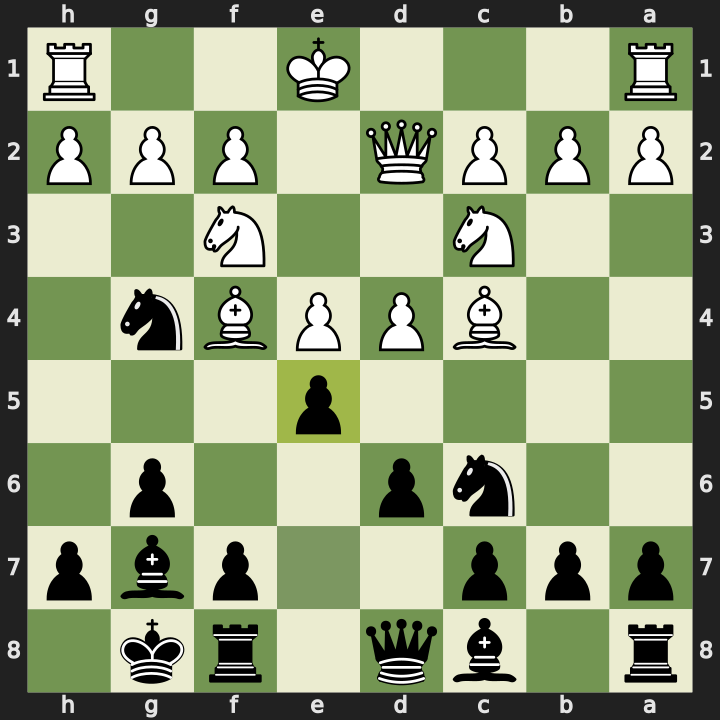
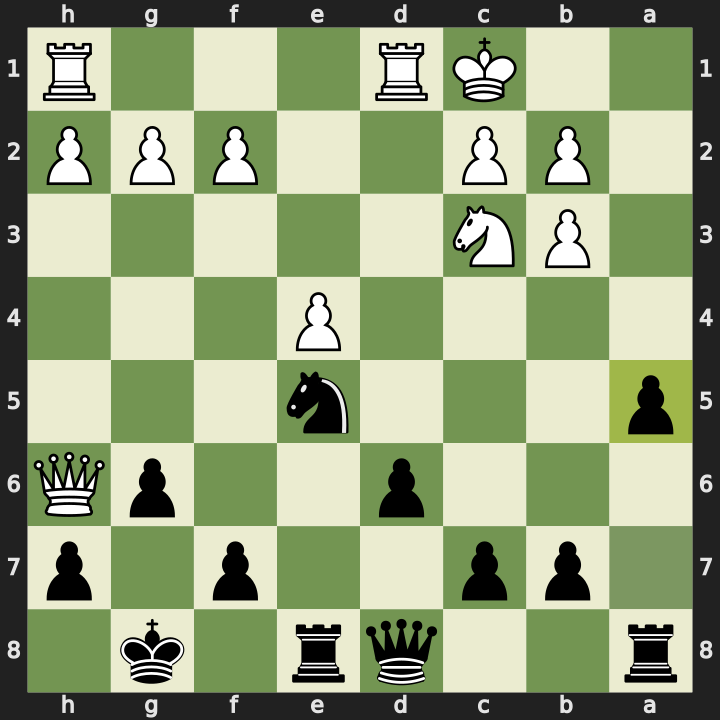
The Queenside Pawn Storm (Moves 15-18)
15…a5 16. Nd5 c6 17. Ne3 a4 18. bxa4 Rxa4
With the kings castled on opposite sides, I wanted counterplay rather than passive defence, so I pushed 15…a5, planning a flank pawn attack down the a-file to go after White’s king, with the rook coming in behind it. White brought the knight to d5, but I could see it couldn’t get to f6, guarded by my queen, so I just kicked it with 16…c6. It had no great square, so it went back to e3 where it’s safe but can’t make much progress.
I pushed 17…a4, asking White to take so that I could recapture with the rook. Either way it’s uncomfortable for White: capture and let my rook out, or leave it and let the pawn crash in on a future move and force a recapture with the pawn shielding the king. White took, and I brought the rook out.
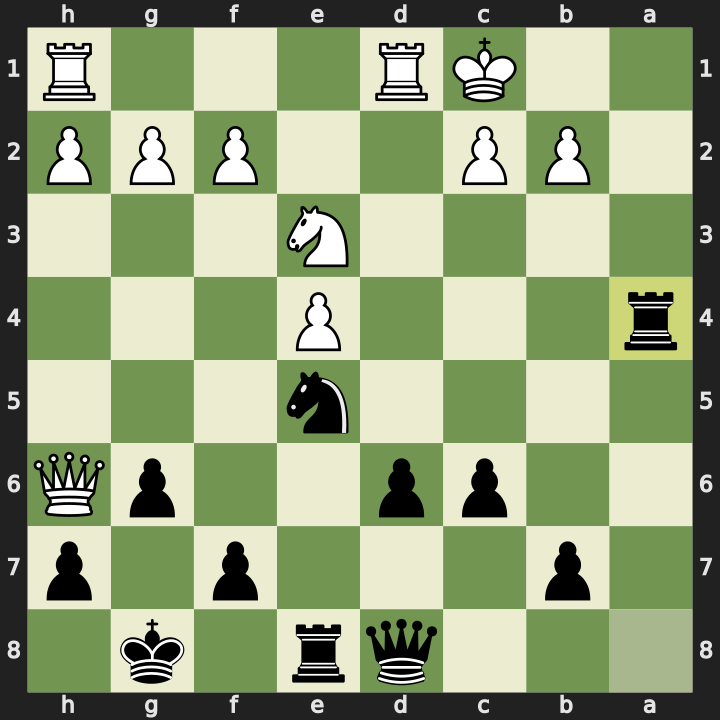
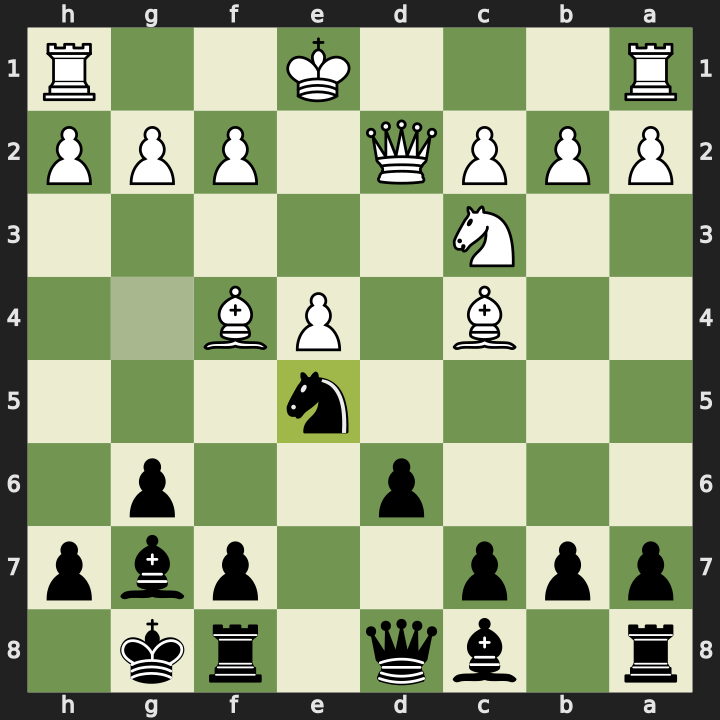
Trapping the Queen (Moves 18-20)
19. b3 Rxe4
The rook on a4 was now conveniently targeting the pawn on e4. If I could take that and then swing the rook over to h4, the queen on h6 would be trapped. White played 19. b3 to threaten the rook, but that rook was heading for e4 anyway, so I just took it.
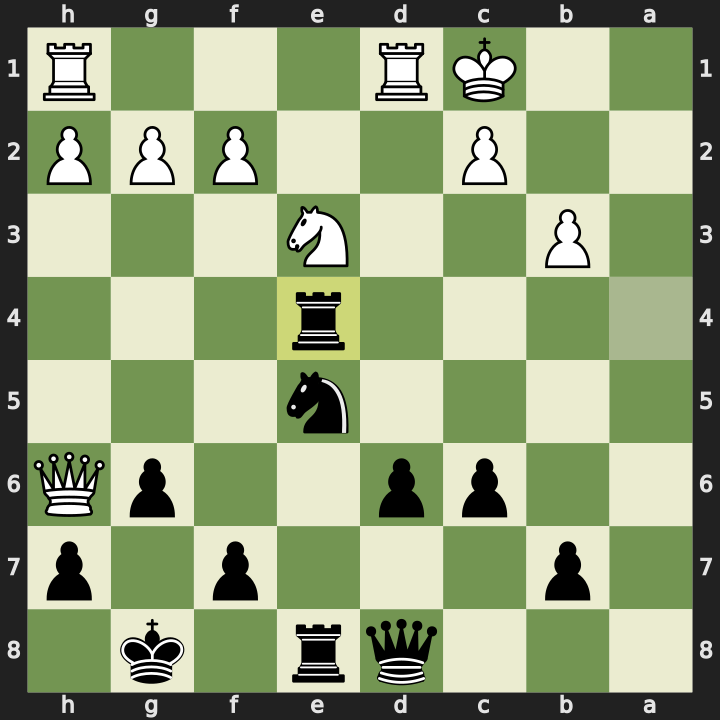
20. f3 Rh4
White played 20. f3 to threaten the rook again, but the rook’s target was the h-file, so over it went.
The plan worked and White’s queen was cornered. It wasn’t quite a free queen, though, because White had one idea to slow me down.
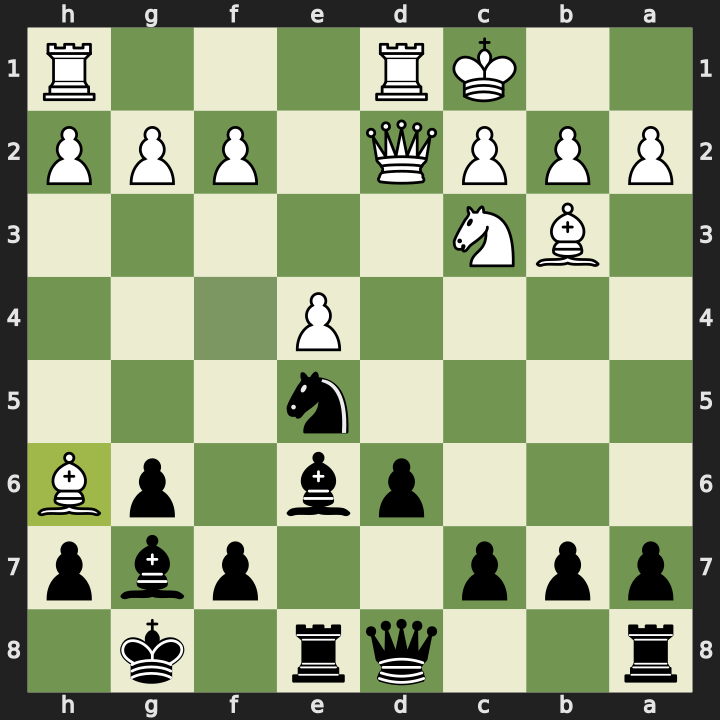
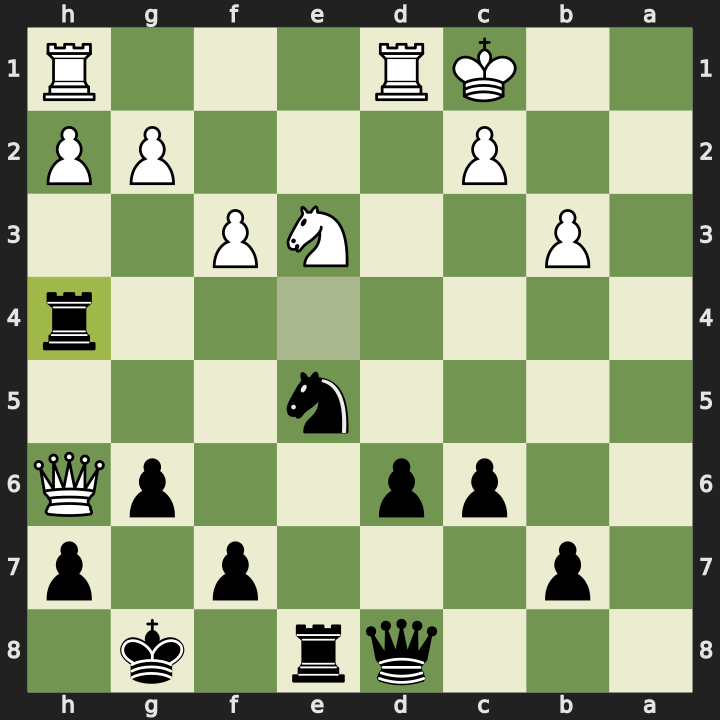
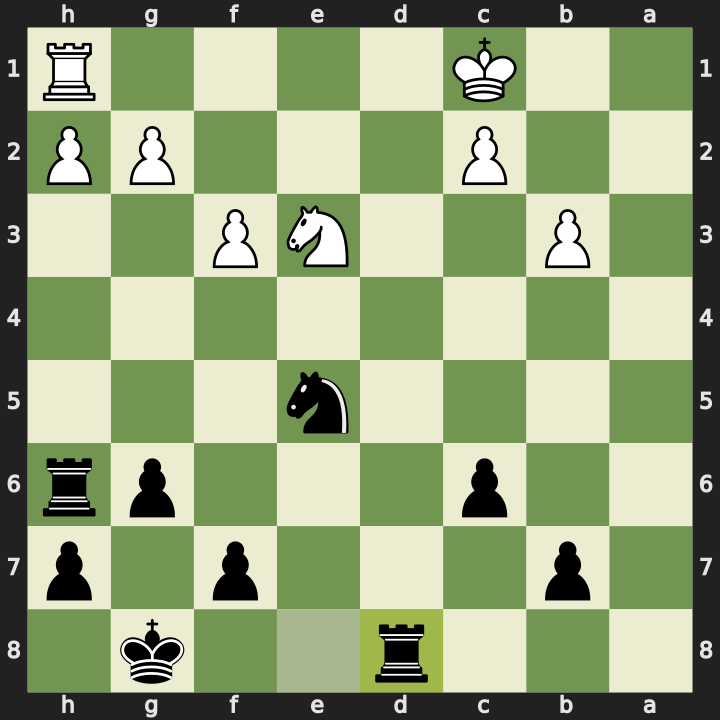
The Finish (Moves 21-22)
21. Rxd6 Rxh6 22. Rxd8 Rxd8
White played 21. Rxd6, threatening my queen. If I recapture the rook, White takes my rook on h4 and the queen escapes. Instead I took the queen with 21…Rxh6. White grabbed my queen with 22. Rxd8, but my queen was defended, so I recaptured the rook with 22…Rxd8 and came out a rook up in the endgame.
White resigned.
Engine Review
92.4% accuracy for me against 80.4% for my opponent, with a game rating of 2050 versus 1550. One great move and ten best moves on my side, no mistakes and no blunders. Chess.com rated my opening a thumbs up and my middlegame a great move.
The analysis is fascinating because it shows White committing to a losing plan and then playing essentially four mistakes in a row. It starts on move 16 with 16. Nd5. That knight was needed to guard against the pawn storm on the queenside, and rather than trying to bring it into the centre or over to the kingside, White should have been pushing the kingside pawns to make a pawn storm of their own. 17. Ne3 was also a mistake. It puts the knight on a square where it can’t do much: it doesn’t defend the incoming a-pawn and it doesn’t help the queen’s attack, it’s just passive. Capturing with 18. bxa4 was an inaccuracy; it would have been better to attack my knight with f4.
The mistakes kept piling up. We hadn’t exchanged much material but it was already a -4 evaluation with Black winning. 19. b3 threatens the rook, but that rook was planning to take on e4 anyway. Then 20. f3 again threatens the rook, but the rook’s target was the h-file, so it’s a mistake that doesn’t really help White at all.
The last couple of moves were technically best moves that leave Black up a rook rather than a queen, but still around -4.5.
Reflections
What went well:
- Handling the queen and bishop battery aimed at my dark-squared bishop. I planned it well: first eliminating the light-squared bishop that was pointing at my king, then trading the dark-squared bishop, leaving White with only one long-range piece in the attack.
- Seeing the plan to attack on the queenside with the a-pawn. Even with a significant attack happening on the kingside, I made sure to initiate counterplay on the queenside, especially with the kings castled on opposite sides. If I’d merely defended my king, I suspect I would have lost.
- The plan to trap White’s queen, spotted a few moves ahead. It turned their attack into a massive weakness and ultimately lost them the game.
- 92.4% accuracy is an excellent result for me. In practice games against bots I can usually win at 80 to 85%, so it’s great to see a daily game in the 90s. Having the opening database for the first few moves and plenty of time to work through all the candidate moves makes a big difference.
What to work on:
- I don’t like having to trade the dark-squared bishop in these positions. It’s much more comfortable to have it pointing at the opponent’s king when they’ve castled queenside, so I want to look at whether I could have played differently to avoid that trade.
- The engine notes that if White had played the best moves they could have dislodged my knight from e5, so I need to check what I should have played had that come up.
Full PGN:
1. e4 d6 2. Nf3 Nf6 3. Nc3 g6 4. Bc4 Bg7 5. d4 O-O 6. Be3 Nc6 7. Qd2 Ng4 8. Bf4
e5 9. dxe5 Ncxe5 10. Nxe5 Nxe5 11. Bb3 Re8 12. O-O-O Be6 13. Bh6 Bxb3 14. axb3
Bxh6 15. Qxh6 a5 16. Nd5 c6 17. Ne3 a4 18. bxa4 Rxa4 19. b3 Rxe4 20. f3 Rh4 21.
Rxd6 Rxh6 22. Rxd8 Rxd8 0-1