Win vs rjt110 (1415)
| Opening: King’s Indian Defense (E61) | Result: 0-1 (Resignation) | Time Control: 3 days/move (Daily) | Rated | Event: 92nd Chess.com Daily Tournament (1201-1400), Round 1 |
Game Overview
This was a tough game against a higher rated opponent with an exciting finish that I’m really proud of. White was doing well out of the opening and was certainly winning through the middle, but a few too many mistakes let me back in. Once the centre locked up I leaned on my pair of knights, generated counterplay on the queenside, and eventually broke through into a promotion race that finished with a string of forcing checks. Not my best King’s Indian, but some good chess when it mattered.
The Opening (Moves 1-10)
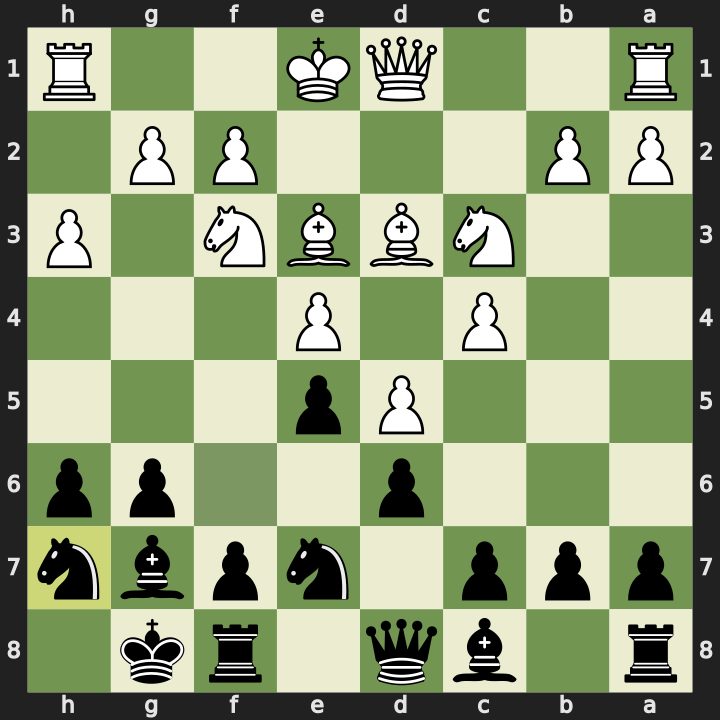
1. d4 Nf6 2. c4 g6 3. Nc3 Bg7 4. Nf3 O-O 5. e3 d6 6. e4 Nc6 7. Be3 e5 8. h3 h6 9. d5 Ne7 10. Bd3 Nh7
The first ten moves were fairly standard King’s Indian. I pushed 8…h6 to prevent Ng5, and I had what I thought was a fairly normal setup, getting ready to push the thematic f5.
The Battery on h6 (Moves 11-13)
11. Qd2
On move 11 White lined up the queen and bishop on the c1-h6 diagonal, a battery aimed at my h6 pawn. It’s a really annoying idea because it can eliminate my dark-squared bishop on g7, which is key to defending the king.
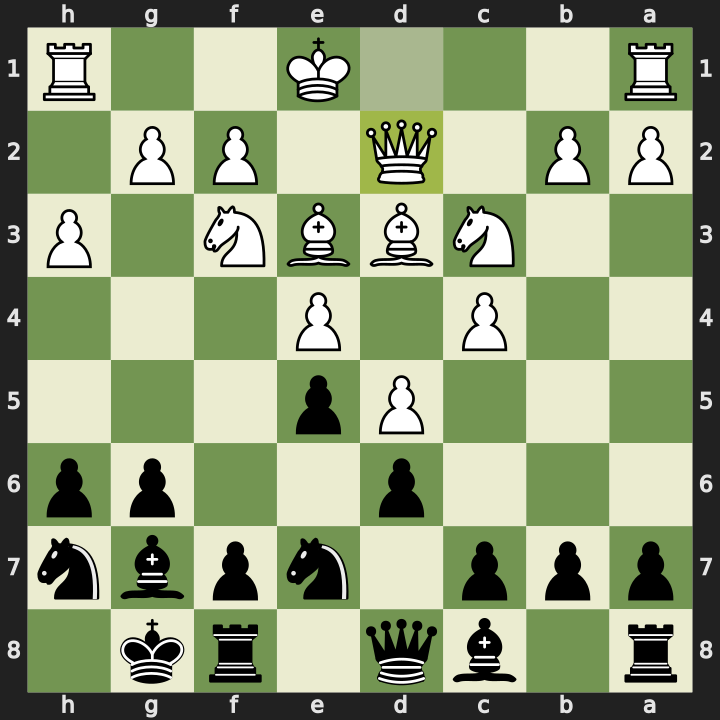
I wasn’t sure whether it would have been better to push g5 here, or drop a knight into g5 to stop the attackers getting in, but I ignored it and played f5.
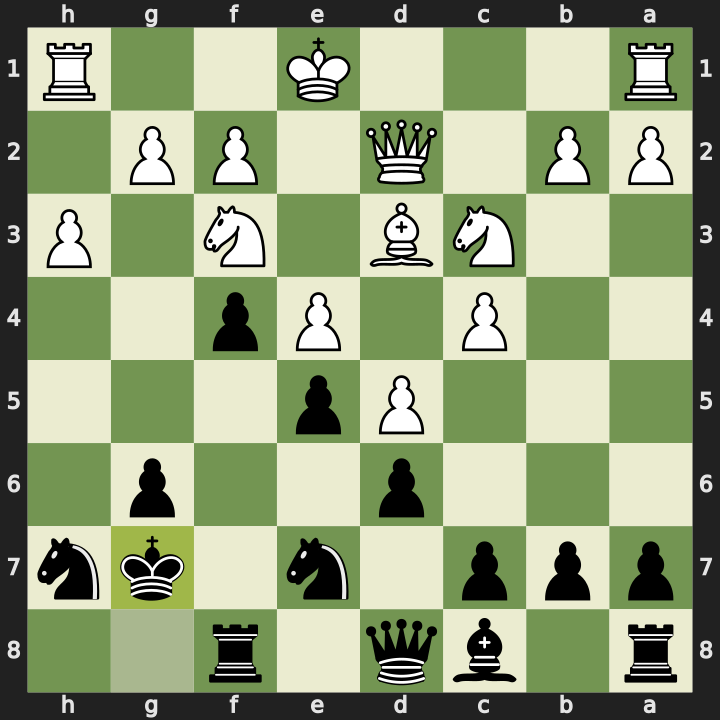
11…f5 12. Bxh6 f4 13. Bxg7 Kxg7
White’s bishop came crashing in, took the pawn and then my bishop, and I had to recapture with the king. Now the h-file is half-open, and the usual plan for the opponent is to charge the h-pawn down the file to completely crack open my king’s defences.
Locking the Position (Moves 14-21)
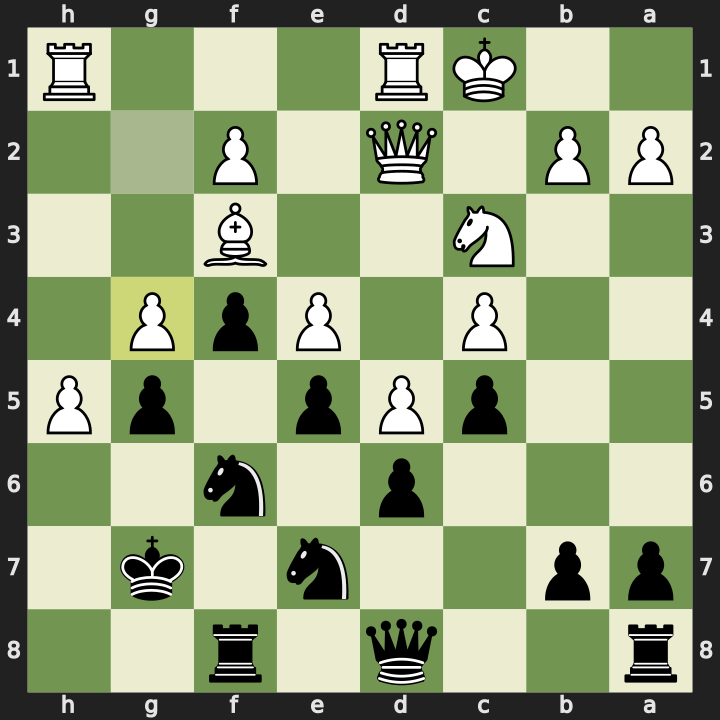
14. O-O-O c6 15. h4 Bg4 16. Be2 c5 17. Ng5 Nxg5 18. Bxg4 Nh7 19. h5 g5 20. Bf3 Nf6 21. g4
White hopped a knight into g5, I took it, and White recaptured my light-squared bishop on g4. Then White pushed pawns on the kingside and I did everything I could to lock up the position. We ended up with pawns facing off on the c-file, d-file, e-file, and g-file, and the centre was well and truly locked. I think that was my only chance given I had a pair of knights and no bishops.
Hiding Behind White’s Pawn (Moves 21-22)
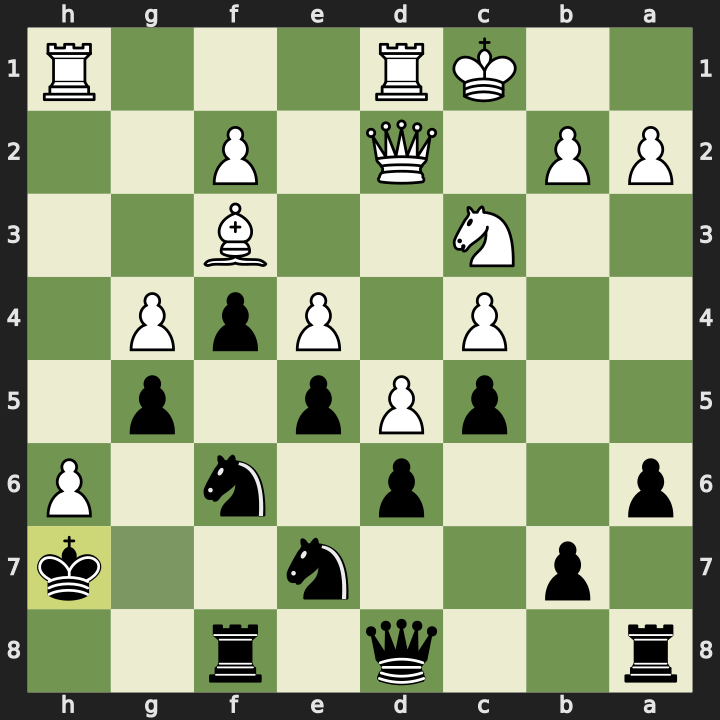
21…a6 22. h6+ Kh7
On move 22 White pushed the h-pawn. It was defended by the rook on h1, and I decided I was going to use it as an impenetrable shield, tucking my king in behind White’s own pawn.
Queenside Counterplay (Moves 23-26)
23. Qc2
I needed to create some counterplay. All the action was happening over near my king, which wasn’t very well defended, so I saw a chance to make a break on the b-file, bring my queen over, and deflect some of the pieces away from my kingside.
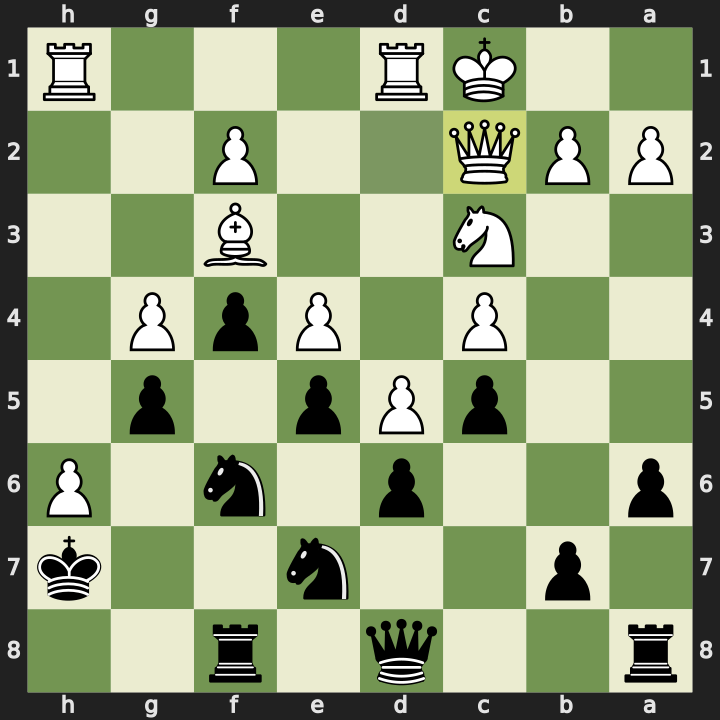
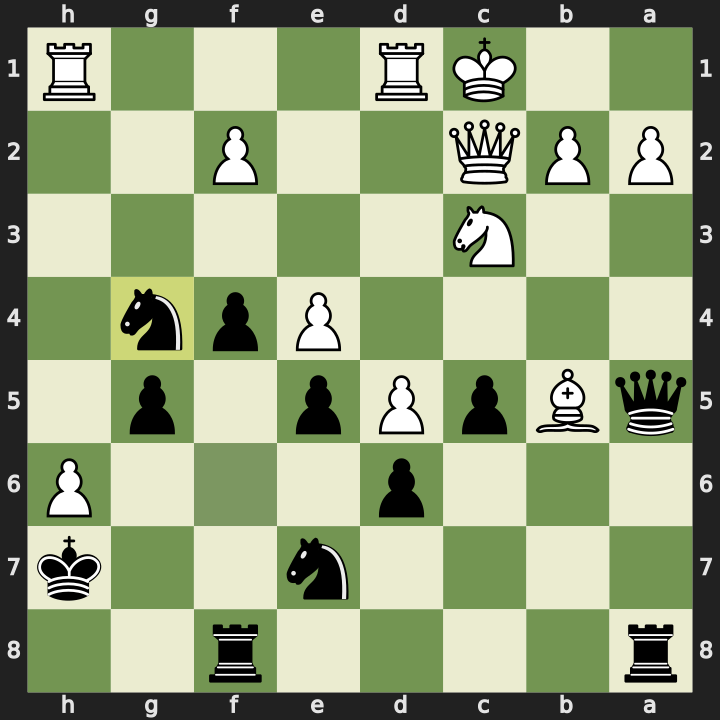
23…b5 24. cxb5 Qa5 25. Be2 axb5 26. Bxb5 Nxg4
I distracted the light-squared bishop over to b5, and with it no longer guarding g4 I got a knight in there and pushed my pawn to f3. Slow progress, but progress.
Breaking Through (Moves 27-34)
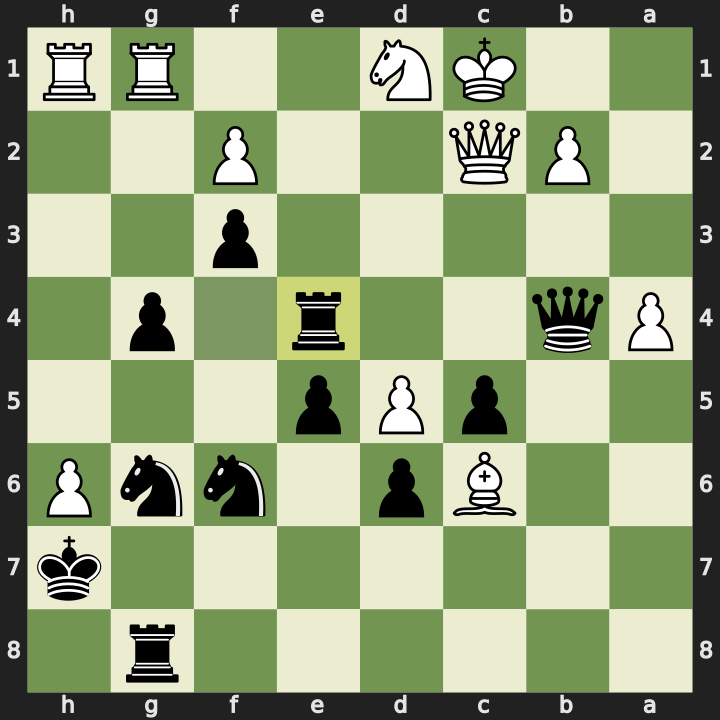
27. Qe2 f3 28. Qd2 Rf4 29. a4 Qb4 30. Rdf1 Nf6 31. Qc2 g4 32. Rfg1 Ng6 33. Bc6 Rg8 34. Nd1 Rxe4
Then a series of improving moves to get my rooks into the game, which is tricky given how locked it was. I got a pair of knights onto the sixth rank, a rook up on f4, and another on g8. The e4 pawn was weak after White played Nd1, so I took it with my rook. This is the moment the game started to feel like it had turned in my favour.
Marching the g-Pawn (Moves 35-40)
35. Ne3 Ne7 36. Rd1 Rg6 37. Kb1 g3 38. Rdg1 g2
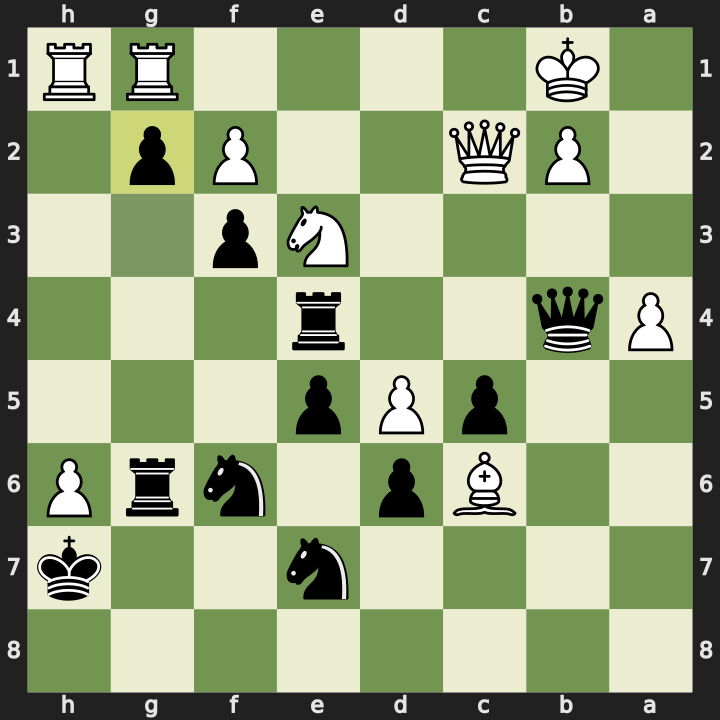
I had a couple of pawns on the g and f files supported by rooks, and I could see a way toward promotion, or at least winning some material, so I pushed the g-pawn. White didn’t take on g3, so I pushed again to g2, threatening the rook on h1, which had only two safe squares: h2 and h3.
39. Rh2 Ng4 40. Rh3
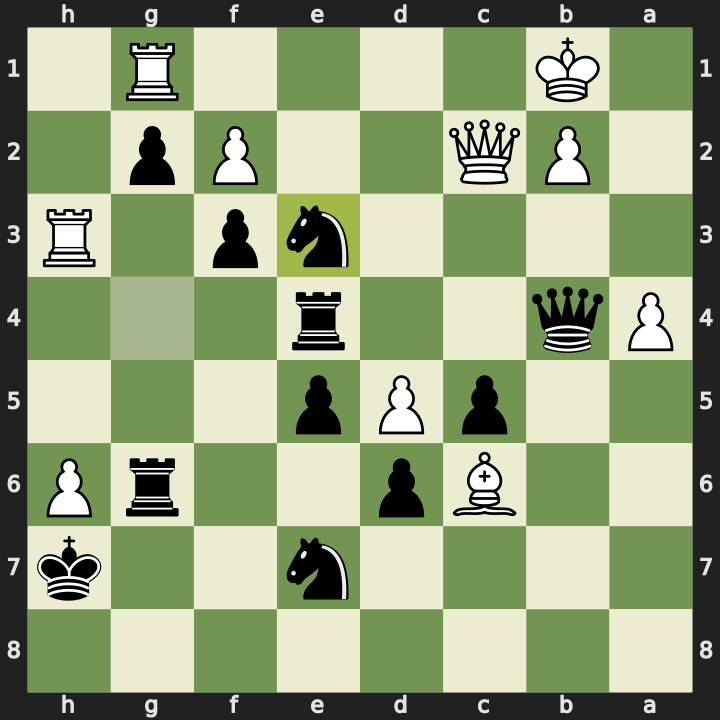
White played Rh2, which let me hop my knight up to g4 to threaten it again. White played Rh3, and that’s where I spotted the tactic.
The Finish (Moves 40-46)
The idea: take the knight on e3, and if White recaptures with the pawn I take it with my rook. Then both my rook and queen target the e1 square. I use that to check with the rook, deflecting the rook on g1, then promote the pawn sitting on g2.
White didn’t see it coming, and instead offered a rook trade with 42. Rxf3. If I simply played on, White would take my pawn on g2, and I couldn’t recapture because my rook on g6 was pinned to my king by the queen on c2. Luckily I’d calculated all of it and went ahead with the check anyway.
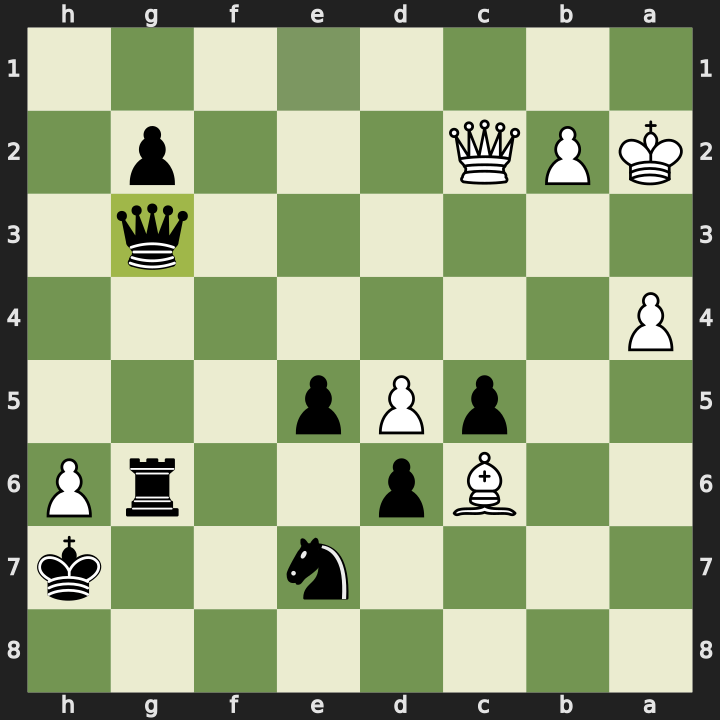
40…Nxe3 41. fxe3 Rxe3 42. Rxf3 Re1+ 43. Ka2 Rxg1 44. Rg3 Ra1+ 45. Kxa1 Qe1+ 46. Ka2 Qxg3
White declined to recapture on e1 and moved the king instead, which let me grab the rook on g1. I’d calculated this line too. Rather than slowly trying to promote and letting White’s rook come in, I played 44…Ra1+, forcing the king to capture on a1, then 45…Qe1+, hitting the king along the first rank and the rook on g3 at the same time. The king had to move, I took the rook, and with the g2 pawn about to promote I’d be up a rook and a queen. White resigned.
Engine Review
The engine agrees this was a more accurate game from me overall: 80.5% against 73.0% for my opponent, and a game rating of 1550 versus 1100. Two great moves and thirteen best moves on my side, with no blunders. White was winning in the middle, they just made a few more mistakes than I did, six for my opponent against two for me, and that swung the advantage my way.
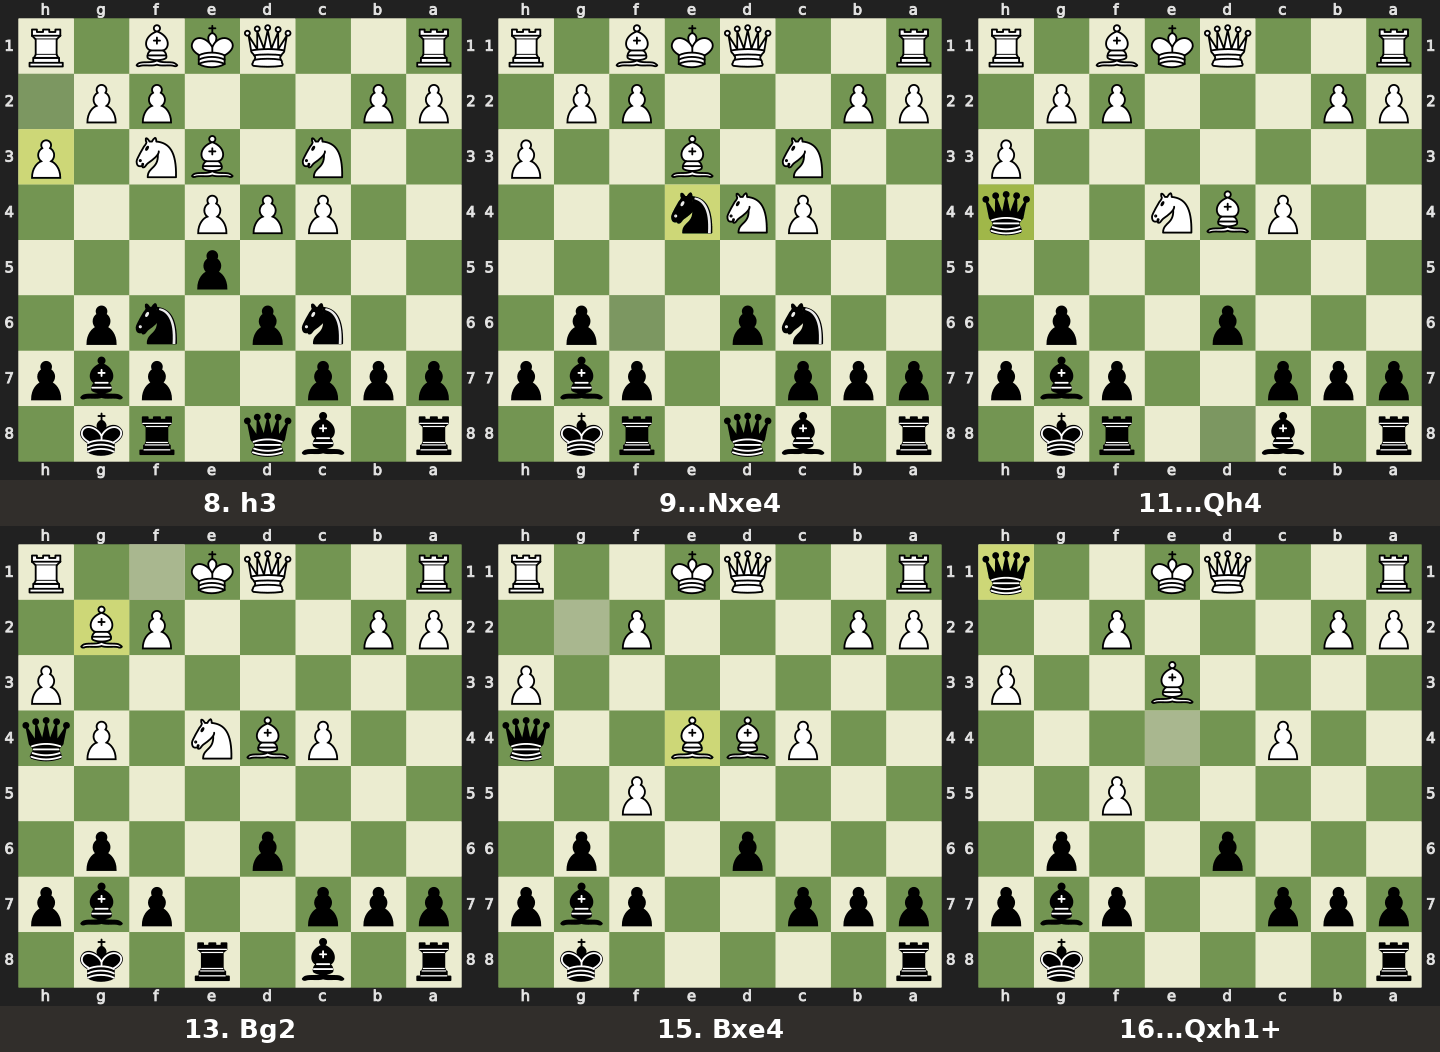
My opening accuracy was low, though, so let’s look at what I did wrong. The first seven moves are fine, and then the engine calls White’s 8. h3 a mistake, with the preferred response being to break open the centre with 8…exd4. There’s a brilliant sequence that follows: 9. Nxd4 Nxe4 10. Nxe4 Nxd4 11. Bxd4 Qh4 12. g4 Re8 13. Bg2 Bf5!! If White takes the bishop with 14. gxf5, then 14…Rxe4! sacrifices the rook, and after 15. Bxe4 Qxe4+ 16. Be3 Qxh1+ White is down a pawn with more to fall, the queen has thoroughly invaded, White can’t castle, and it’s a 3.3 advantage for Black.
Back in the real game, 20. Bf3 was a mistake, I think because it gives me time to reroute a knight to guard the h6 square. White’s 22. h6 push is also a mistake, I suppose because it can later be attacked by a knight and isn’t supported by a g-pawn. My 24…Qa5 was a mistake too: simpler was 24…axb5, opening the a-file so the rook could take on a2 next turn. And 26…Nxg4 was a mistake. The engine prefers piling pressure on the half-open a- and b-files with 26…Rb8, putting two rooks and the queen on those files. Even after some trades, my two knights should be better than White’s knight and bishop given the closed centre and the white pawns stuck there.
White then made a series of inaccuracies and mistakes between moves 33 and 38. Interestingly, the engine recommends an exchange sacrifice on move 35, taking the knight on e3 with my rook. It really shows that in these closed positions the knights are the more powerful piece.
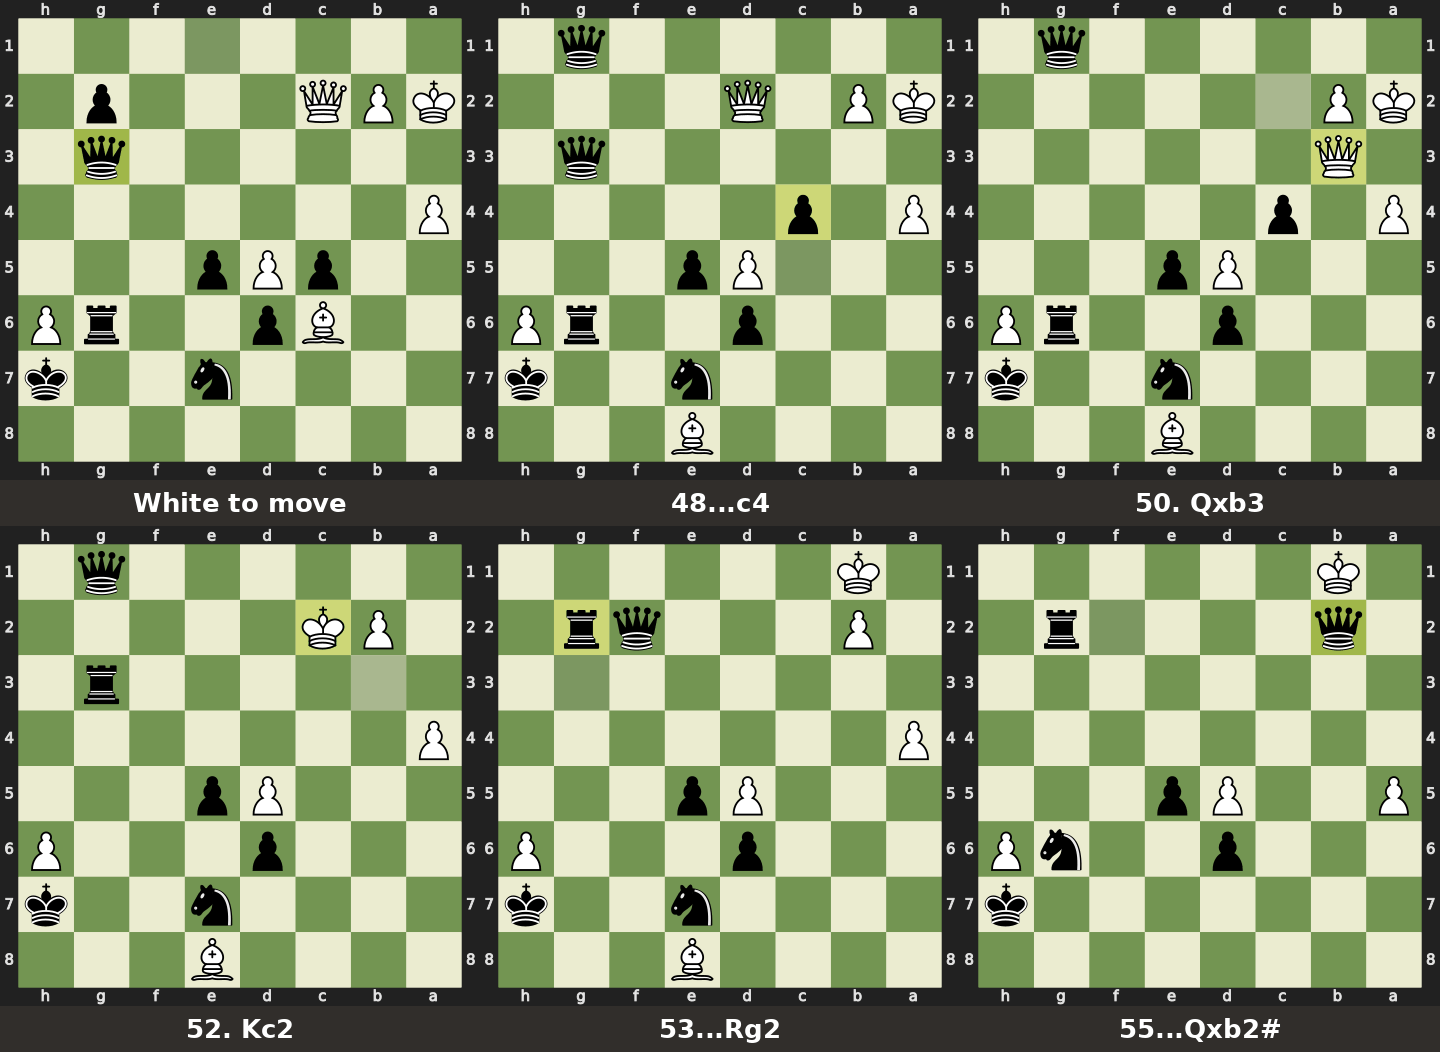
At the point where White resigned, if they’d instead played the engine’s recommended 47. Be8, Stockfish finds a forced mate. I don’t think I’d have calculated it, but I could see I’d be up a rook and a queen with no counterplay for White. With best defence it runs nine moves:
47. Be8 g1=Q 48. Qd2 c4 49. Qc2 Qb3+ 50. Qxb3 cxb3+ 51. Kxb3 Rg3+ 52. Kc2 Qf2+ 53. Kb1 Rg2 54. Bg6+ Nxg6 55. a5 Qxb2#
Reflections
What went well:
- Being patient in the middlegame. I kept looking for good squares and chipping away at a tricky position, defending as best I could until my opponent made a mistake or two.
- The finish. Calculating the whole forcing sequence from Nxe3 through to the promotion, including the pin on my g6 rook and the Ra1+/Qe1+ checks, several moves ahead.
What to work on:
- The opening. My opening accuracy wasn’t what it needed to be. Looking at the engine, once White formed the battery on h6 I should have pushed h5, so that if the bishop takes on g7 it doesn’t come with a free pawn. I can still go for the f5 break after that exchange on g7, and the pawn chain ends up in much better shape, keeping a pawn on the h-file to stop White’s h-pawn from marching down the board.
The engine also prefers the lines where the centre stays open, but I find these closed, locked positions quite fun to play. They’re a bit like a puzzle.
Full PGN:
1. d4 Nf6 2. c4 g6 3. Nc3 Bg7 4. Nf3 O-O 5. e3 d6 6. e4 Nc6 7. Be3 e5 8. h3 h6
9. d5 Ne7 10. Bd3 Nh7 11. Qd2 f5 12. Bxh6 f4 13. Bxg7 Kxg7 14. O-O-O c6 15. h4
Bg4 16. Be2 c5 17. Ng5 Nxg5 18. Bxg4 Nh7 19. h5 g5 20. Bf3 Nf6 21. g4 a6 22. h6+
Kh7 23. Qc2 b5 24. cxb5 Qa5 25. Be2 axb5 26. Bxb5 Nxg4 27. Qe2 f3 28. Qd2 Rf4
29. a4 Qb4 30. Rdf1 Nf6 31. Qc2 g4 32. Rfg1 Ng6 33. Bc6 Rg8 34. Nd1 Rxe4 35. Ne3
Ne7 36. Rd1 Rg6 37. Kb1 g3 38. Rdg1 g2 39. Rh2 Ng4 40. Rh3 Nxe3 41. fxe3 Rxe3
42. Rxf3 Re1+ 43. Ka2 Rxg1 44. Rg3 Ra1+ 45. Kxa1 Qe1+ 46. Ka2 Qxg3 0-1