Win vs pedromholgado (1272)
| Opening: Pirc Defense (B07) | Result: 0-1 (Resignation) | Time Control: 3 days/move (Daily) | Rated | Event: 92nd Chess.com Daily Tournament (1201-1400), Round 1 |
Game Overview
A nice clean Pirc Defense. I’ve been playing this a lot in blitz lately, and this correspondence game played out like a lot of my recent blitz games: open up the centre, trade queens, and use the bishop pair to my advantage. The standout for me was the bishop that normally sits in the fianchetto on g7 relocating to c7, guarding the h2 square from a distance and clearing the way for the rook to come in on the d-file with a back rank mate threat. I felt like I had the initiative for the entire game.
What makes this one satisfying is that it’s a real checkmate. In correspondence chess there’s no time pressure and plenty of time to think, so this wasn’t a case of my opponent flagging or rushing. They fundamentally misunderstood the position and made a mistake, and it went well for me.
The Opening (Moves 1-7)
1. e4 d6 2. d4 Nf6 3. Nc3 g6 4. Bg5 h6 5. Bxf6 exf6 6. Nf3 Bg7 7. Bc4 O-O
The opening went pretty much to plan. I’ve learned to always push 4…h6 as soon as a bishop comes to g5. It’s important to play that before castling, to kick the bishop away or trade it for a knight before White gets a chance to form a bishop and queen battery.
On the 5. Bxf6 trade I recaptured with the e-pawn. After spending time with the engine lately I’ve learned it’s best to take with 5…exf6 here: it gives an incredibly solid pawn structure around the king, even if it blocks the bishop in temporarily. The f6 pawn guards e5 along with the d6 pawn, which lets me recapture if White pushes e5, or push f5 myself without compromising king safety. I’ll be using the doubled pawns to my advantage.
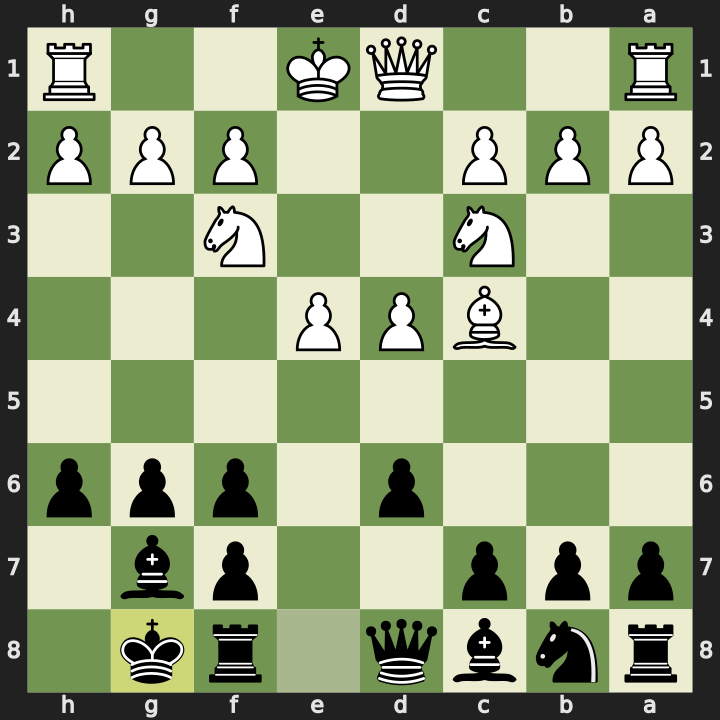
That castled structure is the picture I want to show: the king surrounded by pawns, bishop and rook.
Opening the Centre (Moves 8-11)
8. h3 f5 9. e5
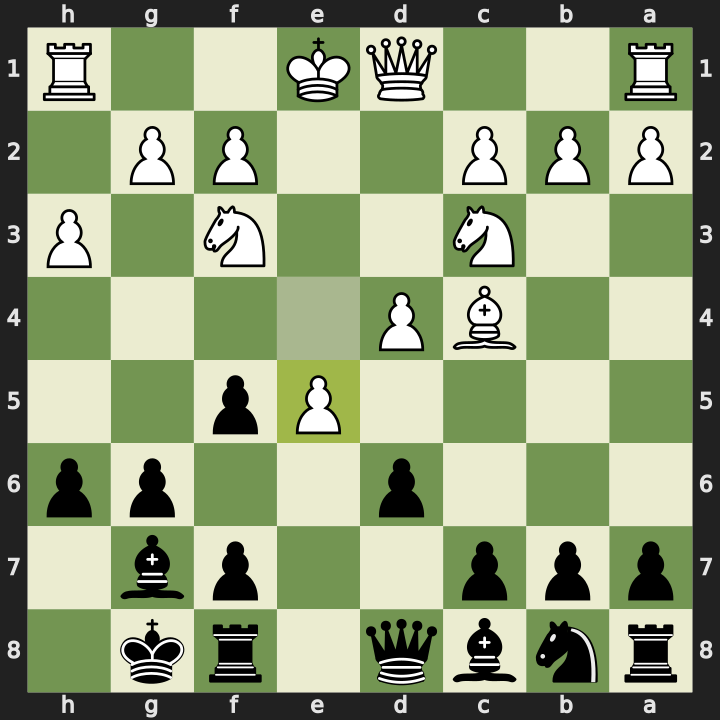
I advanced the f-pawn, White advanced their e-pawn, and now there’s some tension in the centre. I wasn’t too concerned about taking immediately because I have two attackers on e5, the d6 and f6 pawns, and White has two defenders, the d4 pawn and the knight on f3. So I bring in another attacker.
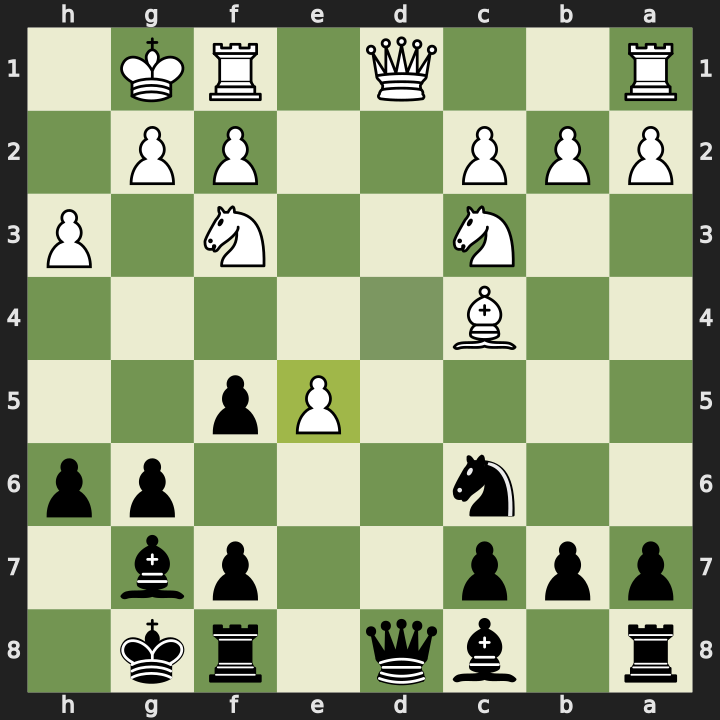
9…Nc6 10. O-O dxe5 11. dxe5 Be6
We exchange pawns on the e-file, and now the queens are eyeing each other down the d-file. I noticed White’s bishop was undefended, so I tried to use that as an opportunity to regain some central control with 11…Be6, asking it what it wants to take. If it captures I recapture with fxe6, and I’m planning to grab the e5 pawn next or trade queens.
Queens Off, Bishops On (Moves 12-14)
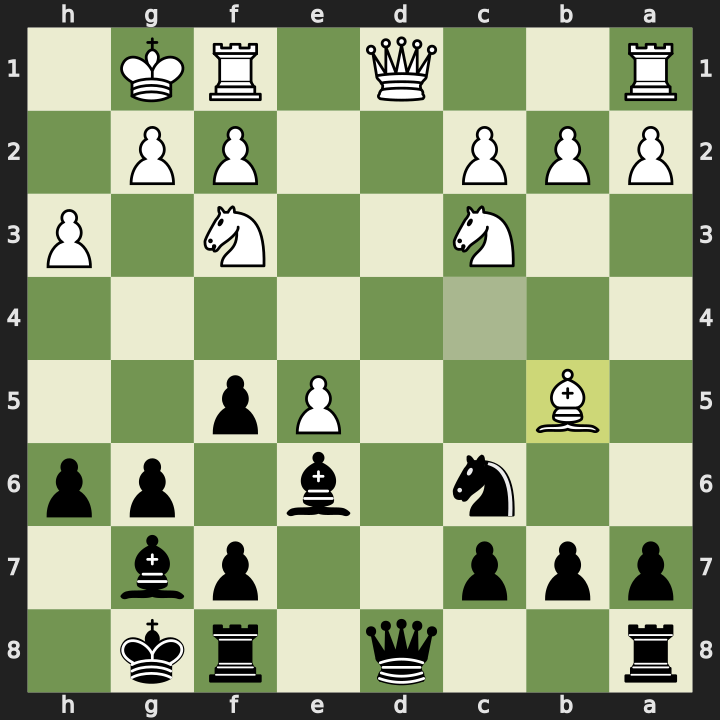
12. Bb5
White chooses not to trade the bishop, instead pushing it to b5. I can see it’s quite awkwardly placed there. It’s not targeting any pieces, and I can hit it later with tempo by playing c6. So I leave it where it is and go for the queen trade.
12…Qxd1 13. Rfxd1 Nxe5 14. Nxe5 Bxe5
I trade queens and then capture the e5 pawn, expecting White to recapture the knight so I can retake with my bishop. That leaves me with a nice pair of bishops, both sitting on the e-file.
The Bishop Reroute (Moves 15-17)
15. Rd3 c6 16. Ba4 Rad8 17. Re3
White advances the rook to d3. I guess this lets them stack two rooks on the d-file, or maybe go for a rook lift sliding it over toward my kingside, but it’s not a particularly forcing move, so I play 15…c6 targeting the bishop. It gets pushed back to a4, and I decide to challenge White for the open file with 16…Rad8. White then slides the rook over with 17. Re3, targeting my undefended dark-squared bishop.
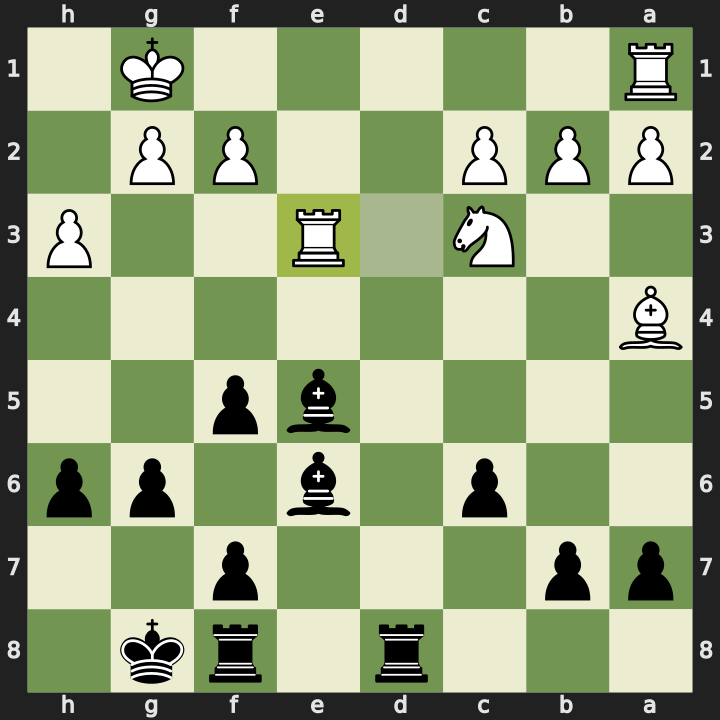
17…Bc7
One thing I’ve been trying to keep in mind lately is that for long-range pieces it’s perfectly fine, even advantageous, to drop them back when they’re under attack, as long as they keep control of the squares they can see. They’re still active without being close to the opponent’s king. So here I drop the bishop back to 17…Bc7. It has excellent activity along the diagonal, and it nullifies White’s escape square on h2. From here I just need to figure out how to get a rook onto White’s back rank. That’s the checkmate threat.
The Finish (Moves 18-22)
18. Rd1
White challenges for the d-file, which actually plays into my strategy.
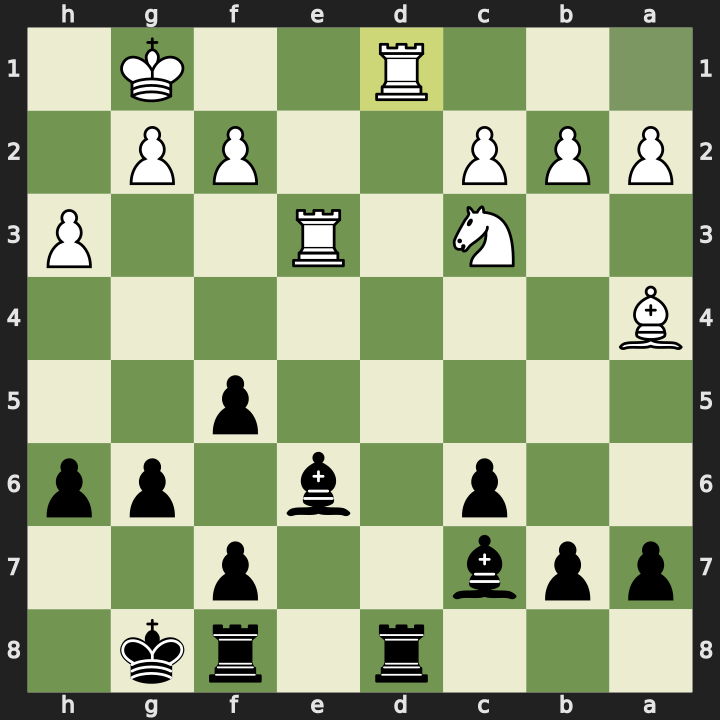
18…Rxd1+ 19. Nxd1 b5 20. Bb3 Rd8 21. Nc3 b4
I use a deflection with 18…Rxd1+, which draws the knight back from c3 to d1 where it no longer guards the b5 square. That lets me push 19…b5 to harass the light-squared bishop. White retreats it to b3, and I bring my rook back onto the open d-file with 20…Rd8, targeting the knight on d1. White jumps the knight back to c3 where it had been guarding d1, but I can kick it away by pushing 21…b4.
Here White has to find the right move. There’s a checkmate threat, so they need to do something like Rd3 to block the file. White doesn’t appreciate the danger and plays the knight to a4, sidelining it, perhaps planning to come forward to c5 later. But it’s too late.
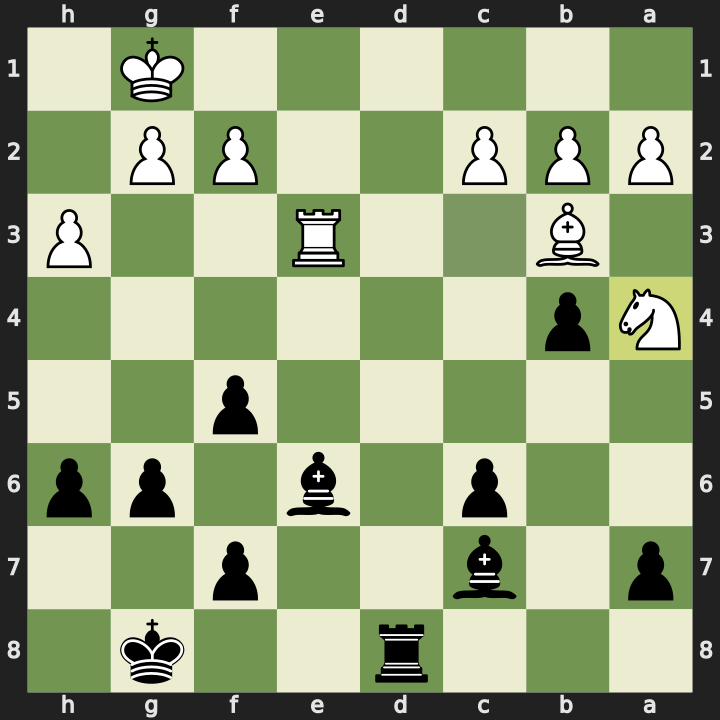
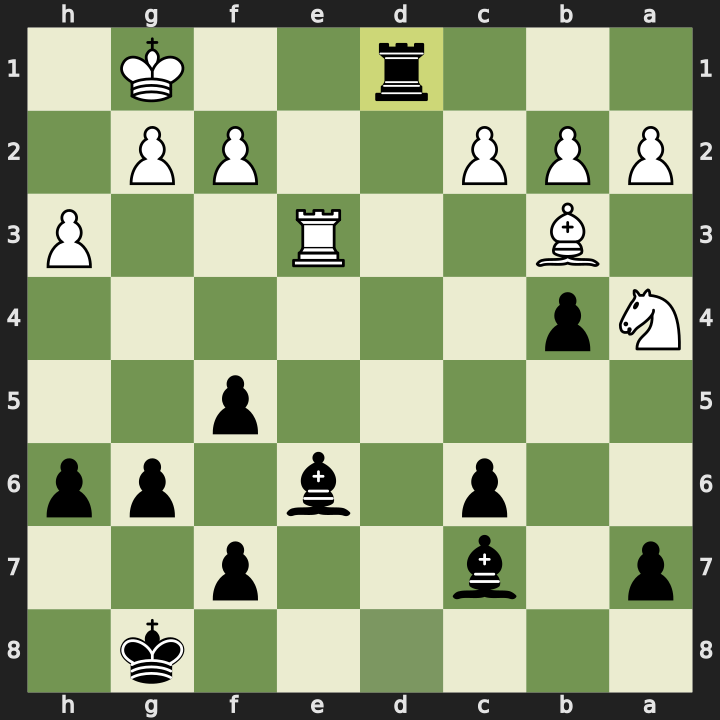
22. Na4 Rd1+
22…Rd1+, and White’s only legal move is Re1. After Rxe1 it’s checkmate. White resigned.
Engine Review
The engine analysis is very encouraging: 91.0% accuracy for me against 71.4% for my opponent, with a game rating of 2000 versus 1000, much higher than my actual rating.
The one mistake was 11…Be6, offering the trade of light-squared bishops. The engine preferred taking the pawn on e5 immediately with 11…Nxe5. What I hadn’t considered during the game was that if White accepts the trade with Bxe6 fxe6, White gets a chance to play Qe2 defending the e5 pawn, so grabbing it while I had the chance was the better move. It turned out not to matter, because White blundered with 12. Bb5 rather than taking the bishop on e6.
What’s really interesting about the analysis of this game is that White’s mistakes and blunder are largely positional. After 12. Bb5 and following the engine line there’s no sudden gain of material for Black, it’s just a pawn, but the evaluation is 2.2 in Black’s favour. The combination of an open centre, the bishop pair, and an extra pawn is enough for the engine to consider it winning.
White’s next mistake was 18. Rd1, offering the rook trade. Again the material is almost equal, but once Rd1 is played the evaluation jumps to about 4 in Black’s favour, and this time the line is concrete: it wins a piece.
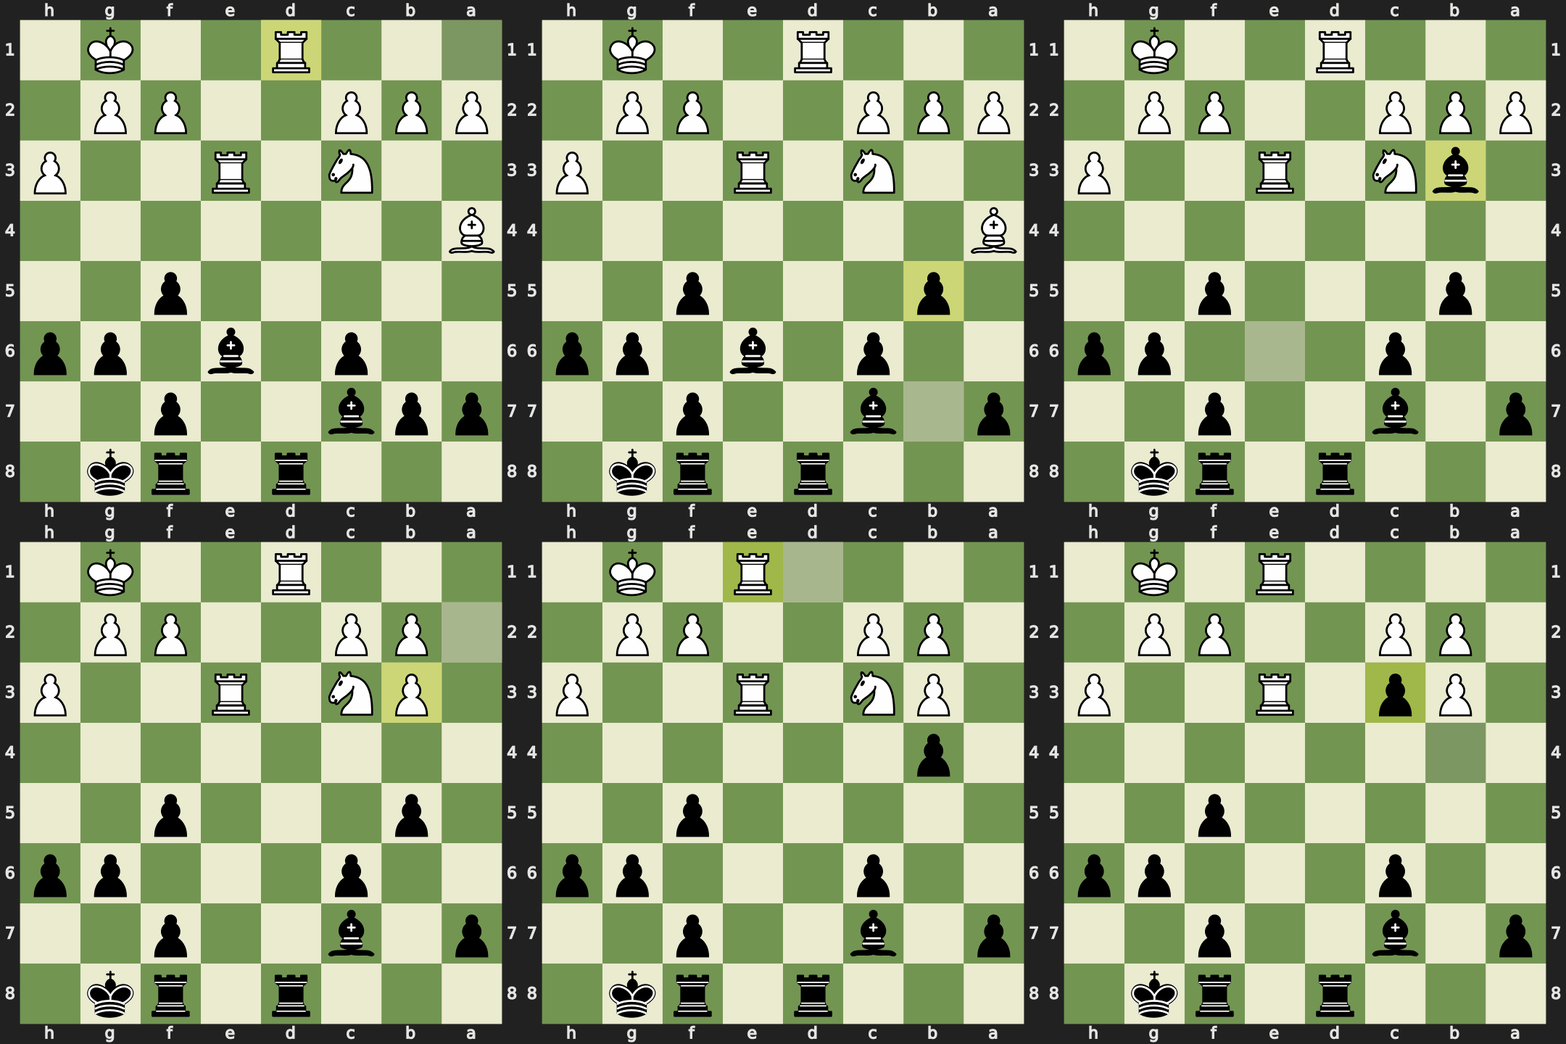
The point is that 18…b5 hits the bishop on a4, and after 19. Bb3 Bxb3 20. axb3 the light-squared bishops come off. Then 20…b4 hits the knight on c3, which is the only piece defending the rook on d1. White can’t just move the knight, because the d1 rook would hang, so White has to play 21. Rde1 to tuck it away. That lets me play 21…bxc3 and win the knight.
The final mistake was 22. Na4, which I capitalised on to reach the checkmate. According to the engine, White’s best was to give up the knight and play Kf1, giving the king an escape via e2. With best play there’s no exciting checkmate finish, but Black just uses the extra piece to win, taking White’s pawns with the rook supported by the bishop.
Reflections
What went well:
- Getting an advantage out of the opening. The whole thing followed a plan I’ve been drilling in blitz: push h6 against the g5 bishop, recapture with the e-pawn for a solid structure, then open the centre.
- Seeing the bishop to c7 idea, moving it away from its usual home on g7. It kept the bishop active while covering h2, which is exactly what made the back rank threat work.
- Seeing a path to checkmate and keeping the initiative for the entire game.
- Getting a genuine checkmate in a correspondence game, where it wasn’t down to the clock. The opponent misunderstood the position and I was ready to punish it.
What to work on:
- The obvious one is the engine line after 11…Be6. It shows that it’s not optimal to delay capturing the pawn in that situation. Better to grab it while you have the chance.
Full PGN:
1. e4 d6 2. d4 Nf6 3. Nc3 g6 4. Bg5 h6 5. Bxf6 exf6 6. Nf3 Bg7 7. Bc4 O-O 8. h3
f5 9. e5 Nc6 10. O-O dxe5 11. dxe5 Be6 12. Bb5 Qxd1 13. Rfxd1 Nxe5 14. Nxe5 Bxe5
15. Rd3 c6 16. Ba4 Rad8 17. Re3 Bc7 18. Rd1 Rxd1+ 19. Nxd1 b5 20. Bb3 Rd8 21.
Nc3 b4 22. Na4 Rd1+ 0-1