Win vs DrPhil (1547)
| Opening: Pirc Defense, Classical System (B08) | Result: 0-1 (Resignation) | Time Control: 14 days/move (Daily) | Rated | Event: ForEverOne 2026, Round 1 |
Game Overview
A fairly solid Pirc where I was able to repel White’s attack and then pounce when they left their queen hanging. With the kings ending up on opposite sides, this became a race, and I went after White’s king on the queenside. By move 27 my heavy pieces were bearing down on the White king, and when White missed the threat and pushed a pawn on the far side of the board, the queen simply dropped.
The Opening (Moves 1-6)
1. e4 d6 2. d4 Nf6 3. Nc3 g6 4. Nf3 Bg7 5. Bf4 O-O 6. Bc4
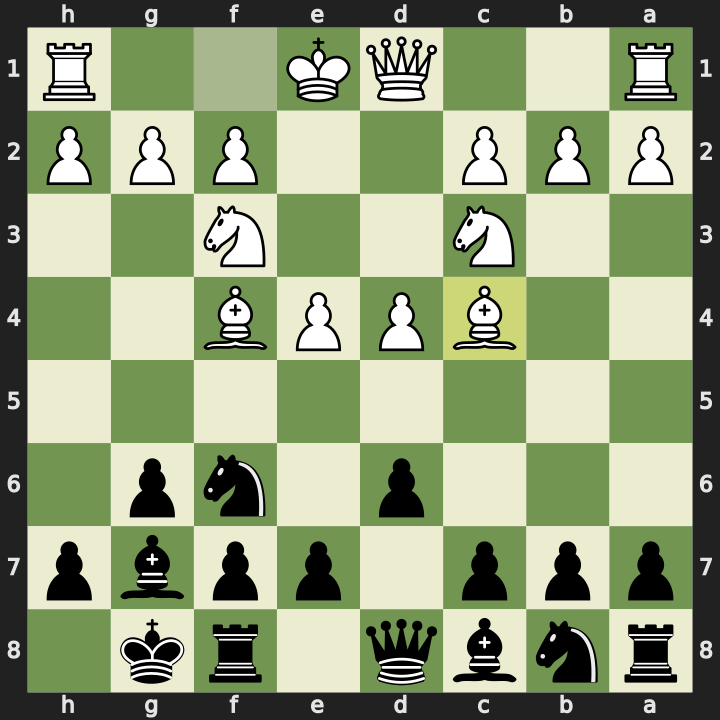
The first six moves were pretty standard. White got into an interesting position with a fully symmetrical setup, knights developed to the third rank and bishops to the fourth. I’m not sure that’s something I can challenge easily. I suppose it gave White plenty of options about which way to castle.
Trading the Bishops (Moves 6-14)
6…Nbd7 7. Qd2 e5 8. Bg5 Nb6 9. Bb3 Be6 10. d5 Bg4 11. Qe3 Qd7
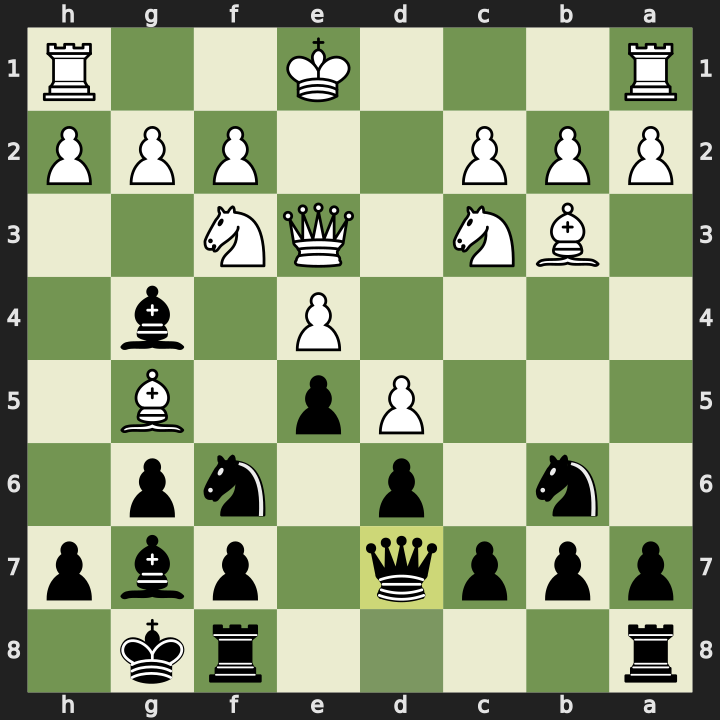
12. Bxf6 Bxf6
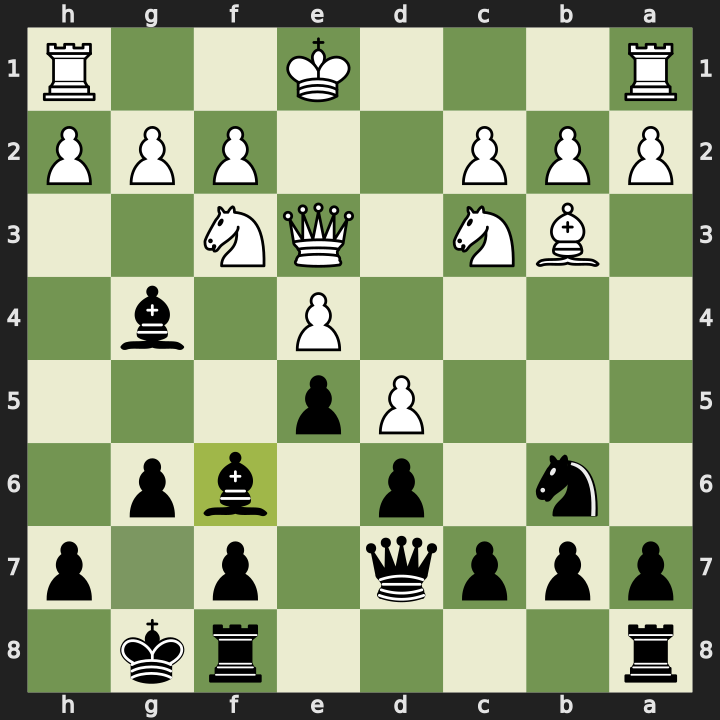
White traded their dark-squared bishop for the knight, a trade I’m always happy to take. The dark-squared bishop is a vital defender of the king, and eliminating White’s makes my own that much safer.
13. h3 Bxf3 14. Qxf3 Bg7
I traded my light-squared bishop for the knight, leaving us with opposite-coloured bishops. Because I’d already moved my queen to d7, there was no way to keep the bishop after h3: dropping it back to h5 would have let White trap it.
Opposite-Side Castling (Moves 15-17)
15. O-O-O f5
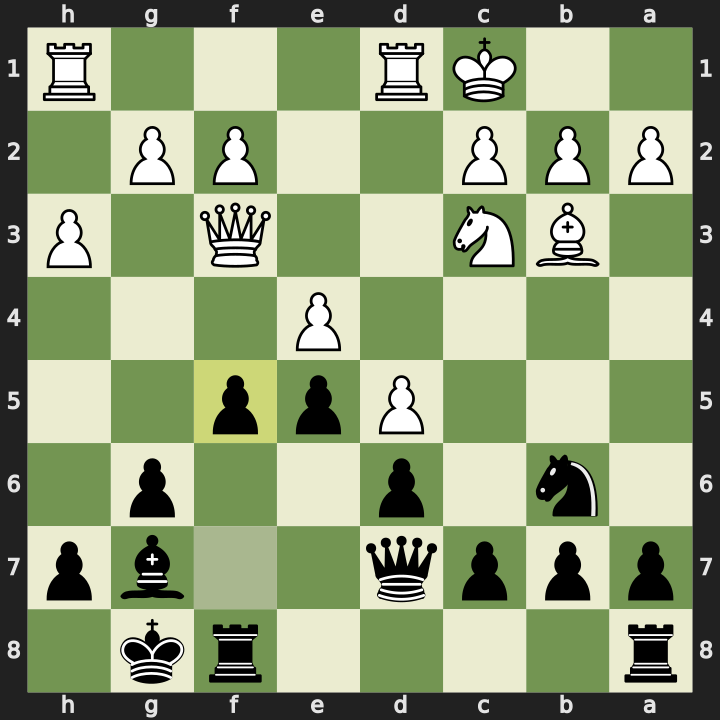
White castled queenside, giving us opposite-side castling, and then made the curious 16. Rdf1, lining the rook up with the queen on the f-file, perhaps with the idea of a pawn storm towards my king backed by the heavy pieces. In hindsight this left that rook very passive, as those pawns never moved and it never saw much activity.
16. Rdf1 fxe4 17. Qxe4 Rf4
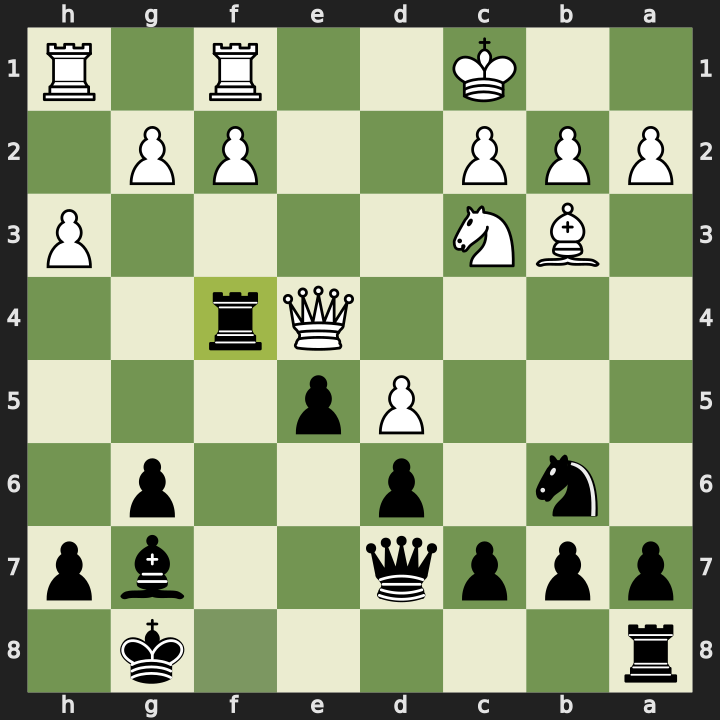
I broke the f-file open and launched my rook forward to f4.
Queenside Counterplay (Moves 18-21)
18. Qe3 a5 19. a3 a4 20. Ba2
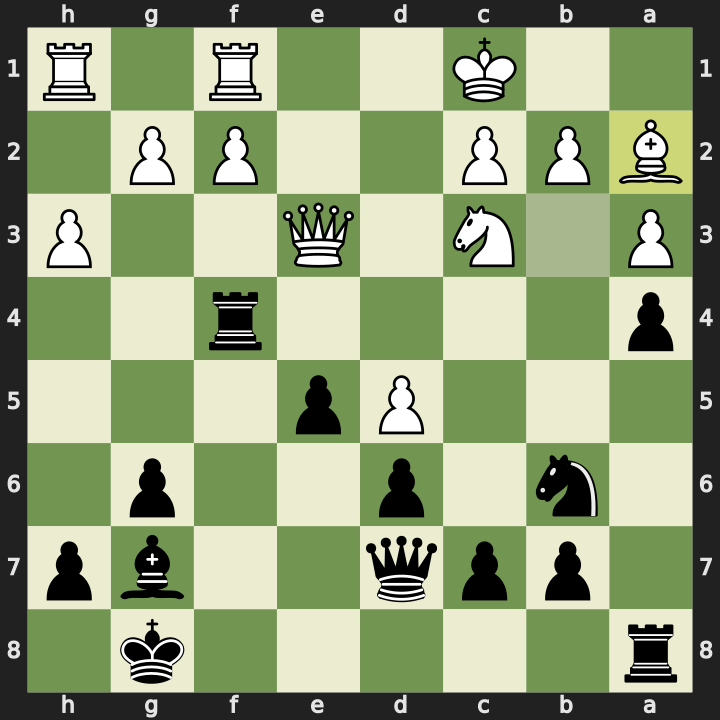
I pushed my a-pawn to attack the light-squared bishop on b3, trying to get my rooks active.
20…Nc4 21. Bxc4 Rxc4
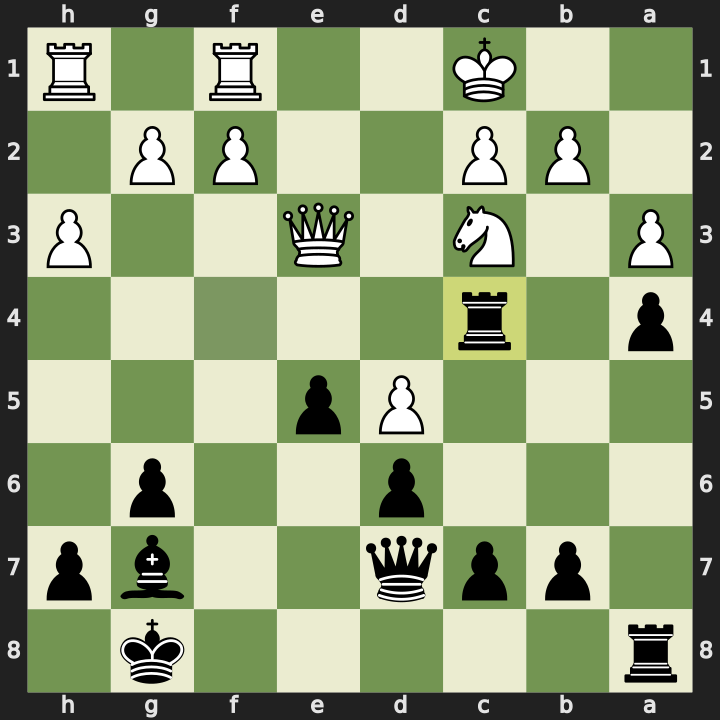
White traded their light-squared bishop for my knight on c4 and I recaptured with the rook, now outside my pawn chain and aimed at my opponent’s king.
The Buildup (Moves 22-26)
22. g4 e4 23. Nd1 c6 24. Qg5 b5 25. Ne3 Rc5 26. c3 b4
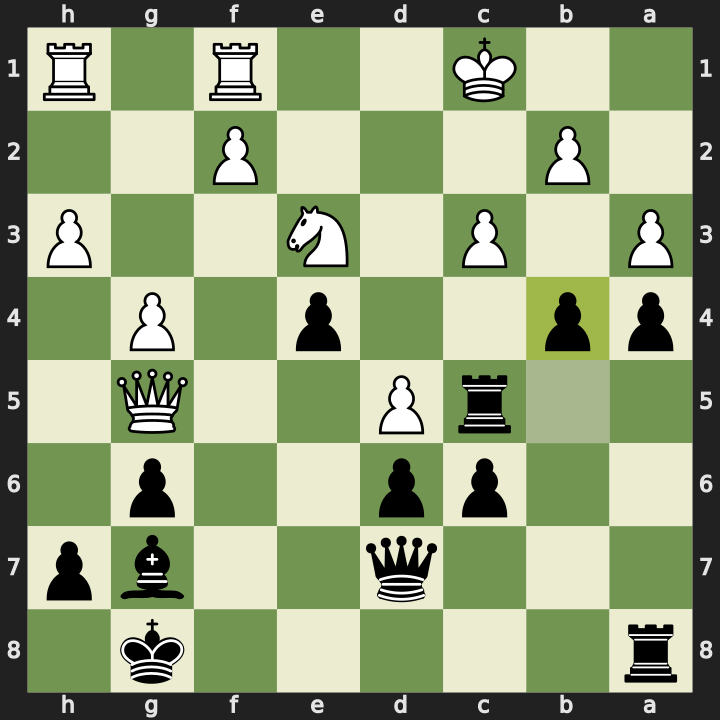
White grabbed space with g4 and rerouted the knight back to d1 and out to e3, while my queen swung over to g5. Meanwhile I pushed my queenside pawns and lifted the rook to c5, building pressure toward White’s king with the pawns leading the way.
The Critical Moment (Moves 27-28)
27. dxc6 Qxc6
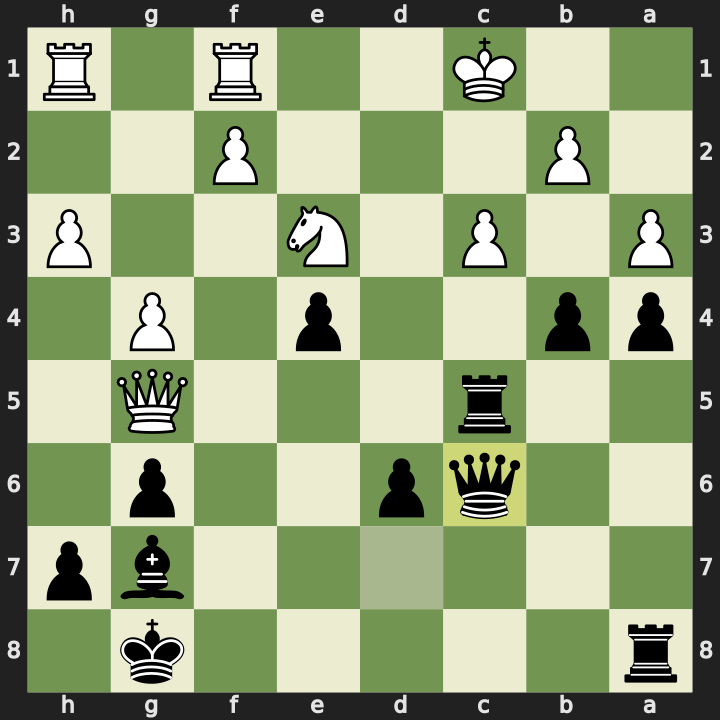
White made a pawn break with 27. dxc6 and I recaptured with the queen. I wasn’t interested in a trade. I wanted to use my queen and rooks to go right through and attack White’s king. With the pawn gone from d5, my rook on c5 now looked all the way across the fifth rank at the queen on g5.
I’d calculated a complex line that leads to checkmate:
28. Nf5 Rxc3+ 29. bxc3 Qxc3+ 30. Kd1 Qd3+ 31. Ke1 Bc3+ 32. Qd2 Qxd2#
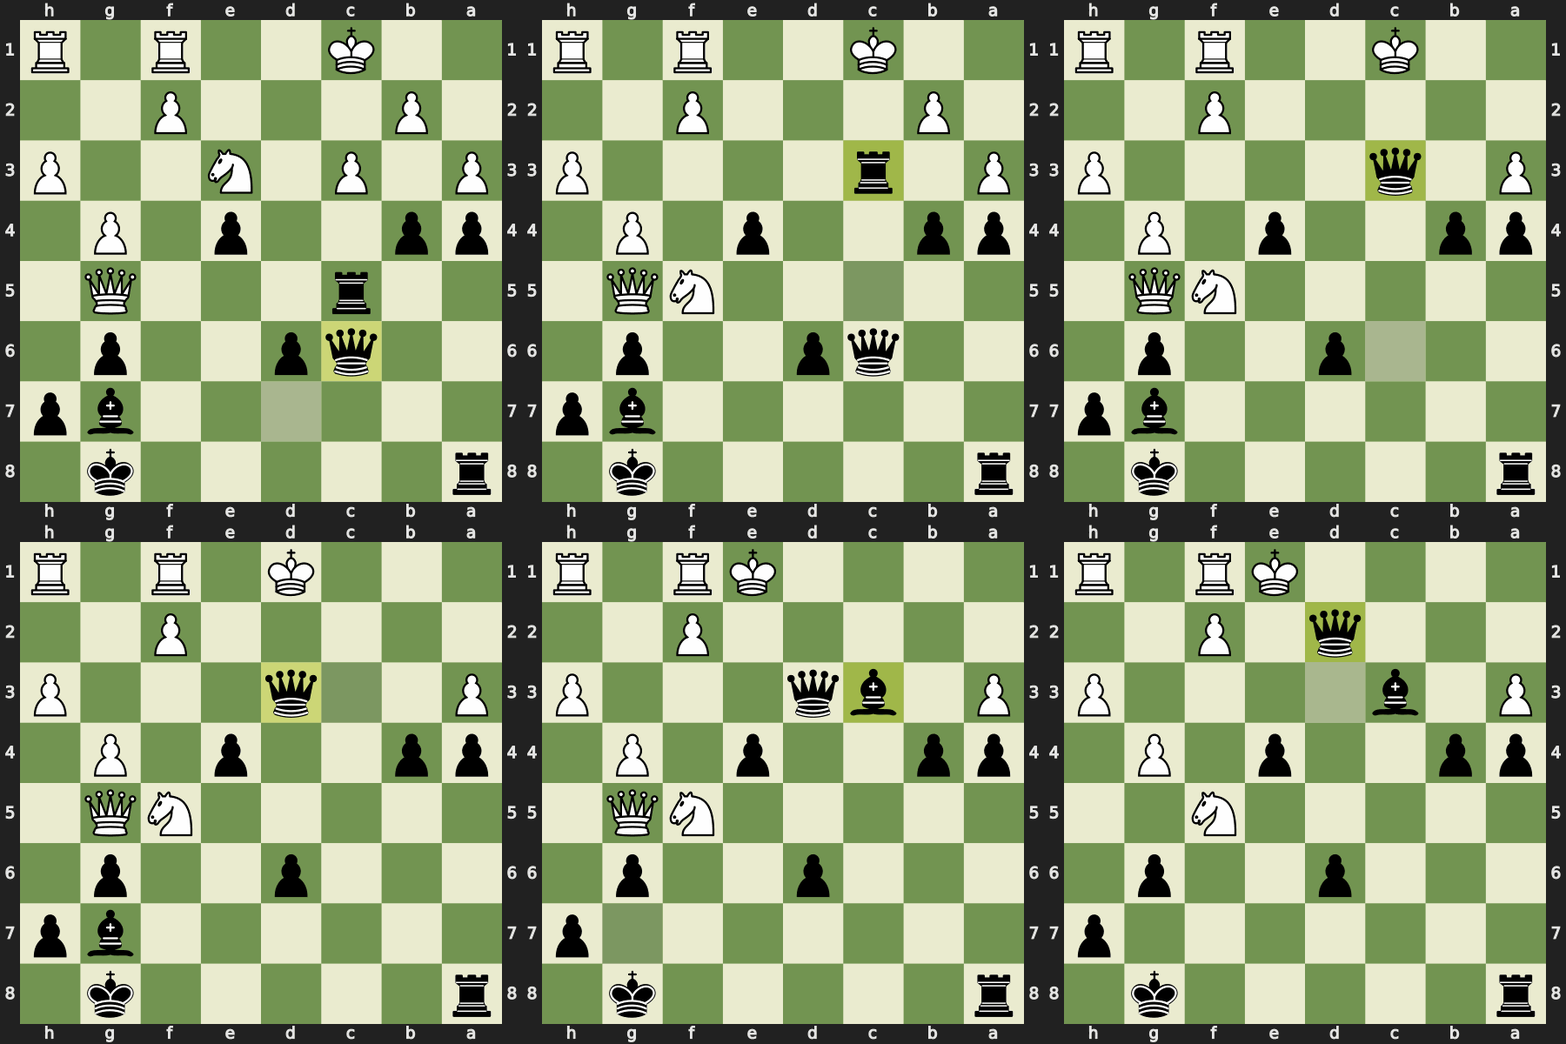
The 28. Nf5 there is White’s best try, and it’s craftier than it looks. On the surface it’s a knight sacrifice that blocks my rook’s line to the queen. Its real point is to tempt me into taking it. If I grab it with 28…gxf5, my g6 pawn disappears, the g-file swings open, and the queen on g5 pins my bishop on g7 to my king.
That pin quietly defuses the whole combination. The mate above finishes with 31…Bc3+, the bishop swinging over with check. But once the g-file is open the bishop is pinned and can’t move at all, so after 28…gxf5 29. gxf5 Rxc3+ 30. bxc3 Qxc3+ 31. Kd1 Qd3+ 32. Ke1 there is no Bc3+ to play and the attack fizzles out.
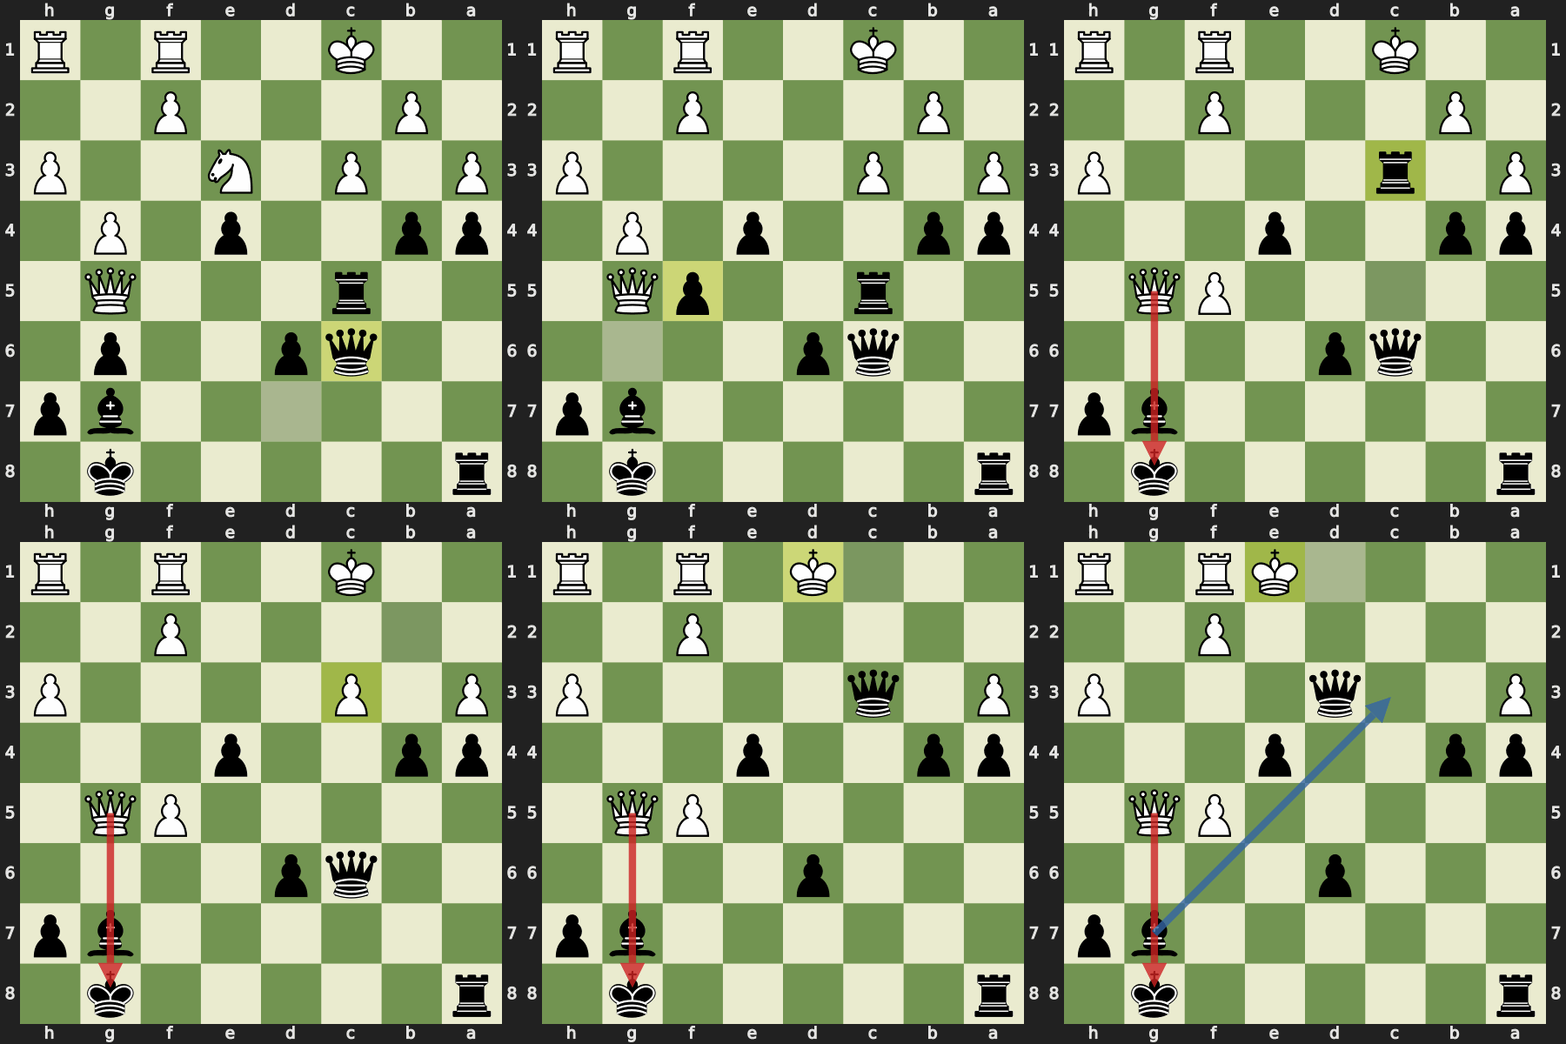
So I leave the knight alone. Playing 28…Rxc3+ straight away keeps my g6 pawn on the board, shielding the bishop so it stays free to land on c3. In the end none of this was needed.
28. c4 Rxg5
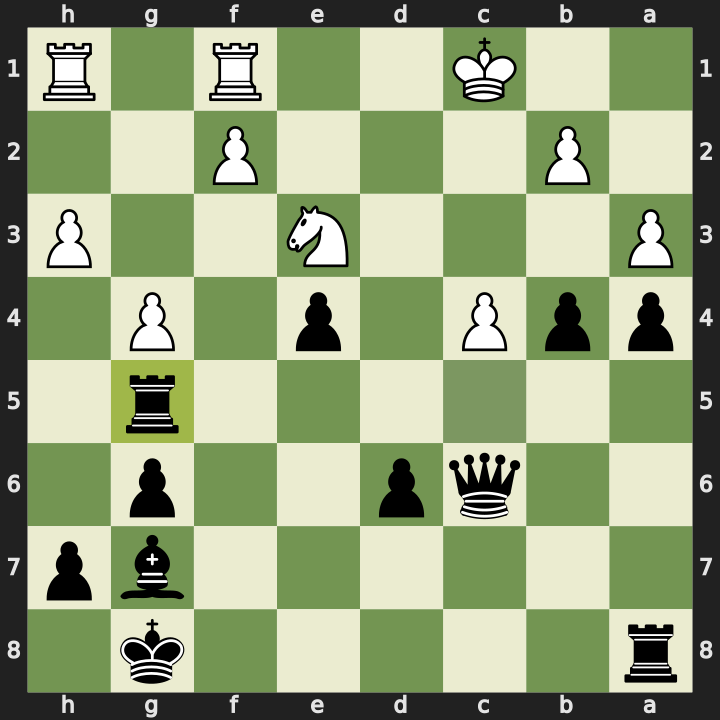
White blundered by pushing 28. c4, ignoring the threat and leaving the queen hanging. I took it, and White resigned.
Engine Review
85.7% accuracy for me against 74.1% for my opponent, with a game rating of 1850 versus 1200. The eval chart shows the position fairly equal until move 22. There were no blunders from either side, but six mistakes from my opponent, and it all came down to move 28.
After 27…Qxc6 my rook on c5 was already attacking the queen on g5, so White had to deal with the threat. With full Stockfish 18, the best move was the 28. Nf5 I’d been preparing for, blocking the rook’s line to the queen. The second best was 28. Qe7, with the plan of sacrificing the queen for the bishop on g7. Instead 28. c4 left the queen hanging and I won it with 28…Rxg5.
One correction to my calculation: the line I’d worked out doesn’t lead to a guaranteed checkmate. It only mates if White recaptures the rook with 29. bxc3. White can decline the rook sacrifice with 29. Kb1 instead, running the king out of the mating net, and then force the queens off to survive into a lost endgame: 29…Qc4 30. Ne7+ Kh8 31. Qd5 Qxd5 32. Nxd5 Rb3.
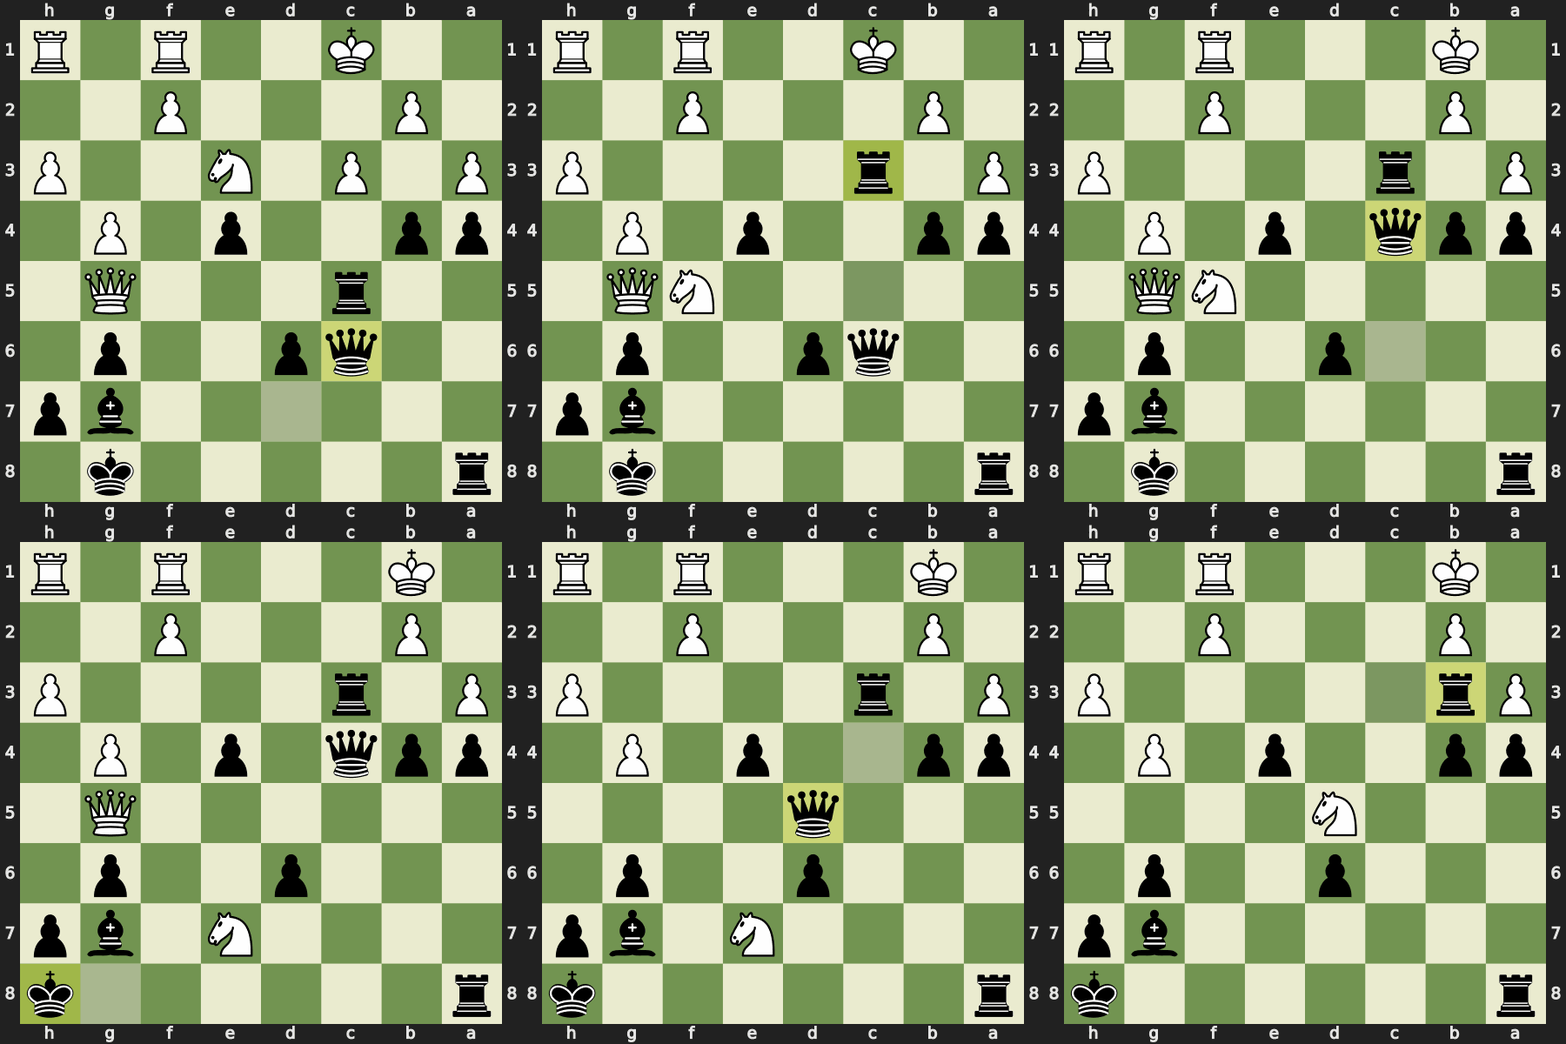
The 30. Ne7+ is the key. It’s the little check that clears the knight off f5 so the queen can reach d5 and offer the trade. After the queens come off I’m left grinding an endgame a pawn up, with my bishop against White’s knight, which the engine rates around -8 for me. So the plan was still sound. It just relied on White playing the natural response, taking the rook with the pawn, rather than leaving it and retreating the king.
Reflections
What went well:
- The opening. I’m happy with how it went, I made no mistakes, and I came up with a reasonable plan to go after White’s king.
- Spotting the attack. My last win in a daily game involved a beautiful queen sacrifice, so I’m very much on the lookout for sacrifice tactics at the moment, and it’s nice to see that mindset turning into concrete attacking lines.
What to work on:
- I need to consider more closely what happens when opponents don’t accept sacrifices. As we saw in this game, leaving material on the board and running the king away is sometimes the best move for my opponent, and I’m not weighing that up when I calculate candidate moves for them.
Full PGN:
1. e4 d6 2. d4 Nf6 3. Nc3 g6 4. Nf3 Bg7 5. Bf4 O-O 6. Bc4 Nbd7 7. Qd2 e5 8. Bg5
Nb6 9. Bb3 Be6 10. d5 Bg4 11. Qe3 Qd7 12. Bxf6 Bxf6 13. h3 Bxf3 14. Qxf3 Bg7 15.
O-O-O f5 16. Rdf1 fxe4 17. Qxe4 Rf4 18. Qe3 a5 19. a3 a4 20. Ba2 Nc4 21. Bxc4
Rxc4 22. g4 e4 23. Nd1 c6 24. Qg5 b5 25. Ne3 Rc5 26. c3 b4 27. dxc6 Qxc6 28. c4
Rxg5 0-1